¡Hola de nuevo!
Soy Sandra Ruano y hoy os presento la cuarta entrega del Mistery Quilt by Komola Krafts. Seguimos con la misma ilusión e intriga que el primer bloque. ¿Cómo lo lleváis? Creo que ya vais teniendo una idea de lo que nos une la costura.
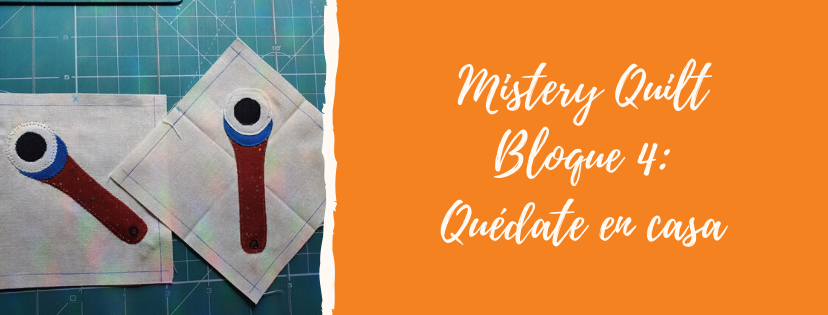
Cuarta Entrega Mistery Quilt by Komola Krafts: Quédate en Casa
En la cuarta entrega vamos a trabajar una técnica muy conocida por todos vosotros y diferente a las anteriormente usadas en otras entregas de nuestro Mistery: la técnica del Festón a mano o a máquina.
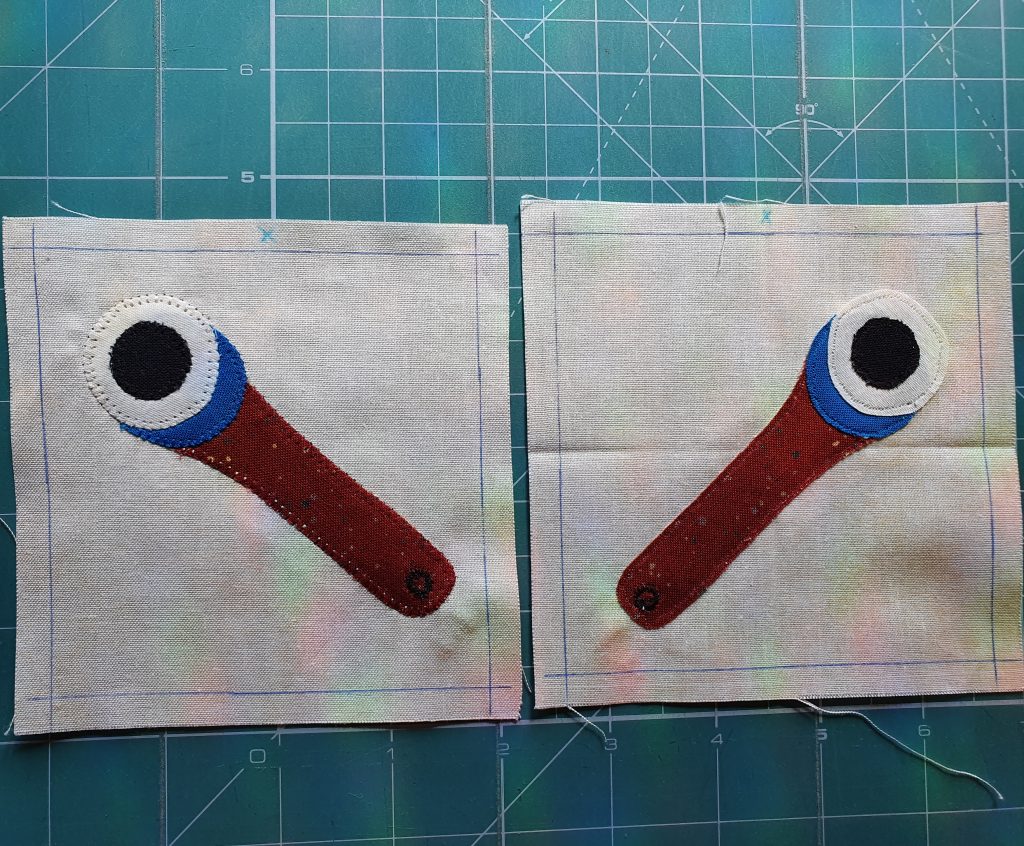
En este bloque podemos trabajar en centímetros o en pulgadas. Sus medidas son de 10cm x 10cm ó 4″ x 4″ y estará protagonizado por un cúter. Este trabajo lo haremos dos veces iguales (sí, sí, iguales) y os voy a decir cómo mover uno de ellos para que parezca que lo hemos hecho en espejo.
Antes de listar el material necesario, queremos que tengáis en cuenta que a las medidas hay que añadirles siempre el margen de costura ya que si no lo tenéis en cuenta, no os cuadrará:
- Tela de fondo – Dos trozos de tela de 10cm x 10cm ó 4″x4″.
- Mango – Dos trozos de 8cm x 4cm ó 3¼” x 1½”.
- Círculos de tamaño grande – Cuatro trozos de 4cm x 4cm ó 1½’’ x 1½’’.
- Para los círculos medianos – Dos trozos de 3cm x 3cm ó 1¼’’ x 1¼’’.
- Círculos pequeños – Dos trozos de 1cm x 1cm ó ½’’ x ½’’.
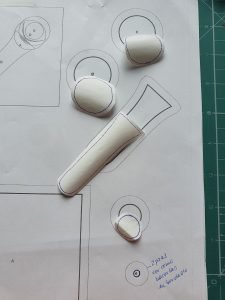
A continuación, detallamos los patrones, sin margen de costura.
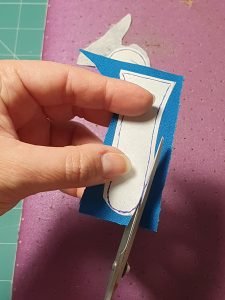
En primer lugar, calcaremos las piezas en Heat and Bond u otro papel adhesivo de doble cara que tengamos en casa sin los márgenes de costura. Una vez recortados, los pegamos por el revés de la tela y los cortamos por la línea del patrón. Con esto ya tenemos los patrones por separado.
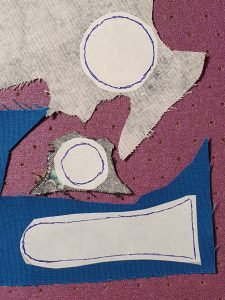
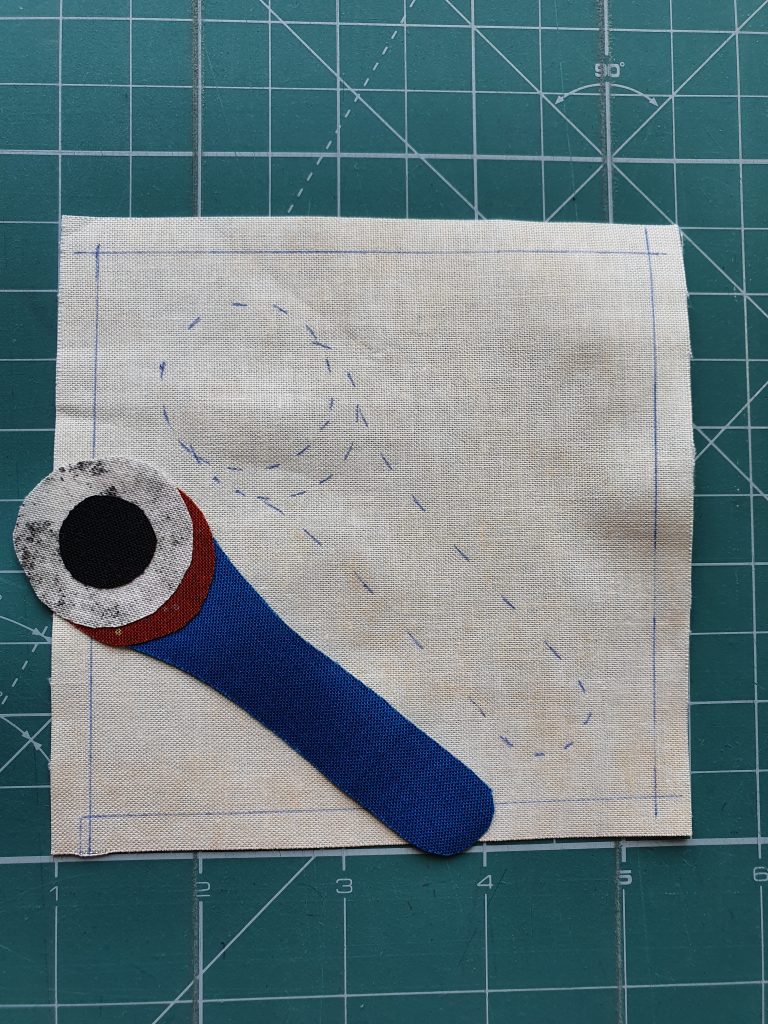
En este momento colocamos cada pieza en su lugar y formamos el cutter, lo planchamos para que queden las piezas pegadas.

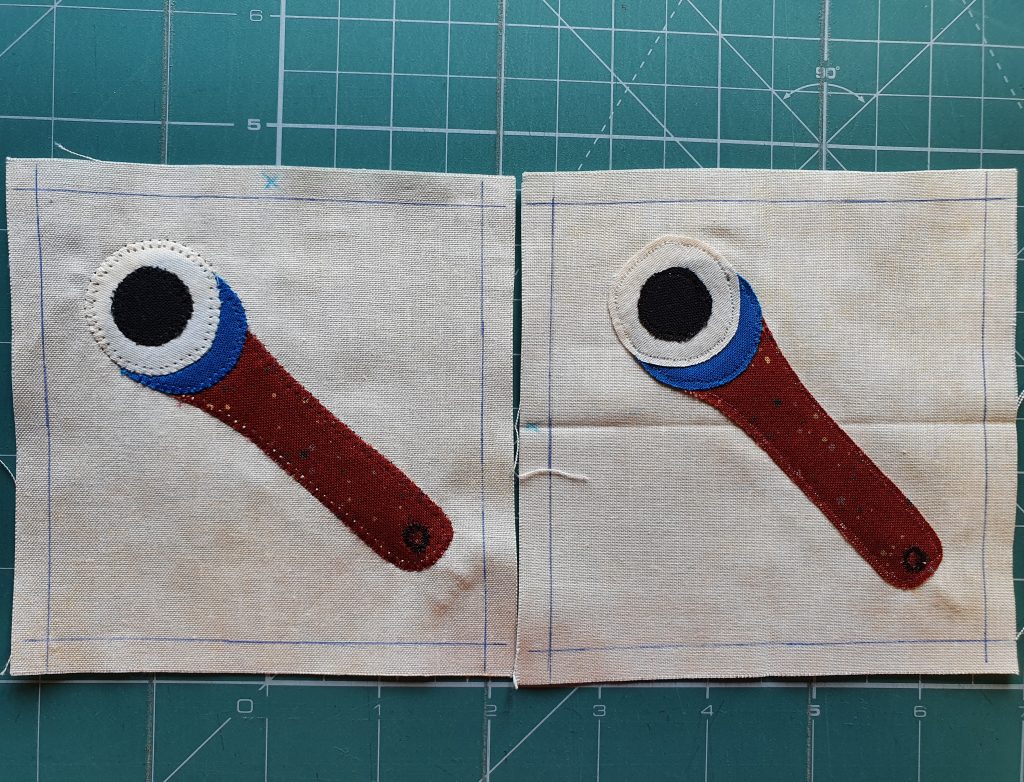
Ahora aplicamos el cúter sobre la tela base, utilizando el truco que les enseñe en el vídeo del primer bloque. Después lo planchamos y tenemos los dos bloques iguales.
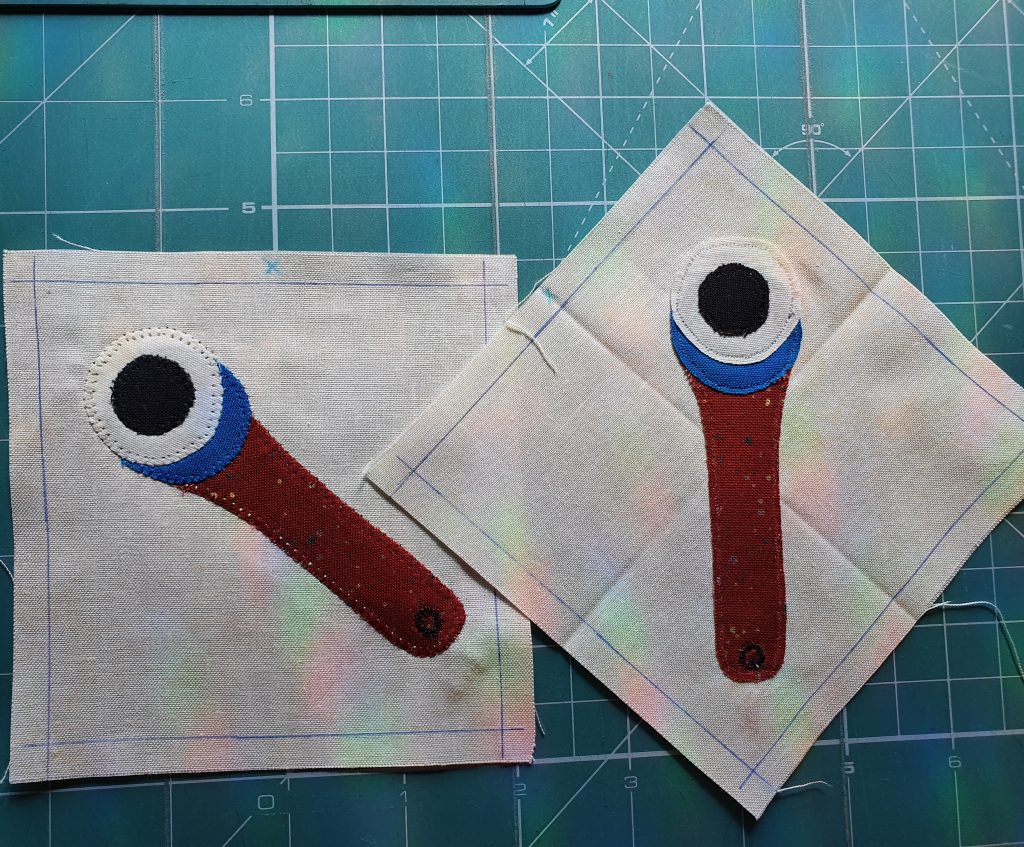
El truco que os he mencionado antes es que el bloque de la derecha lo giro hacia la derecha y ya tengo los bloques en espejo.
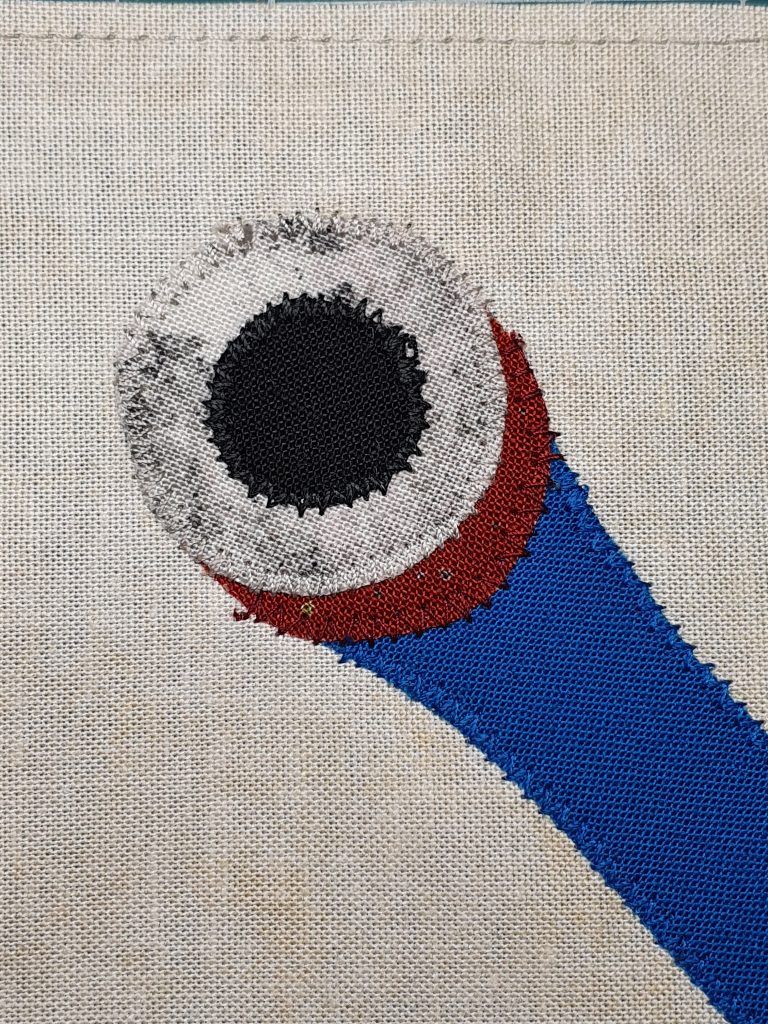
Ya tenemos los bloques preparados para hacerle la costura a festón ya sea a mano o a máquina. Por otro lado, si tu máquina de coser no tiene festón como la mía, yo he hecho la aplicación del cúter cosida con un zig-zag, o también podéis hacerle una puntada decorativa. ¡Como más os guste!
Espero que os guste y os resulte agradable y fácil de hacer en estos momentos de confinamiento.
Un Abrazo a todos.
Sandra Ruano.
Telas para el bloque del próximo lunes 27 de abril:
Ya sabéis que hemos creado un grupo en Facebook para compartir los bloques realizados, consultar dudas y todo lo que necesitéis. ¡Os esperamos por allí!
¡Nos leemos en la próxima entrega!
ENGLISH VERSION:
Hello again!
I’m Sandra Ruano and today I present, the 4th release of the Mistery Quilt by Komola Krafts. We continue with the same joy and intrigue as in the first block. How are you all doing? I think you have an idea of what unites us, sewing.
Fourth Release Mistery Quilt by Komola Krafts: Stay at Home
On this fourth release we’ll be working a technique well-known by all of you and different to the ones previously used on other releases of our Mistery: the technique of hand or sewing machine made festoon. In this block we can work either with centimeters or with inches. The measures are 10cm x 10cm or 4” x 4”and it will be stared in by a box cutter. This job will be done two times (equal one to another) and I’m going to show you how to move one so it looks as if we made it mirror to the other.
Before listing the necessary material, we want you to take into consideration that we have to add a sewing margin to the measures because if you don’t, it will not line up:
-Background lining – 2 pieces of lining of 10cm x 10cm or 4” x 4”
-Handle – 2 pieces of 8cm x 4cm or 3 ¼ ” x 1 ½“
-Big sized circles – 4 pieces of 4cm x 4cm or 1 ½“ x 1 ½“
-Medium sized circles – 2 pieces of 3cm x 3cm or 1 ¼“ x 1 ¼“
-Small sized circles – 2 pieces of 1cm x 1cm or ½“ x ½”
If your press the following button, you can download the patterns for this block.
First of all, we’ll trace the pieces in Heat n’ Bond or other double-sided adhesive paper that we have at our disposal without the sewing margins. Once cut, we paste them to the reverse of the lining and we cut them through the pattern line. With this we have the separate patterns. (See first three pictures).
In this moment we place each piece on its place and we form the cutter, we iron it for the pieces to stick together. (See picture 4).
Now we place the cutter on top of the background lining, using the trick that I showed you on the video of the first block. Then we iron it and we have to equal blocks. (See pictures 5 & 6).
The trick that I mentioned before is that the right block is turned right and there I have the blocks mirrored. (See pictures 7 & 8).
Now we have the blocks prepared for the sewing to be done. On the other side, if your sewing machine doesn’t have a festoon as mine, I made the appliance of the cutter with a zig-zag pattern, or you can also give it a decorative stitch. As you may prefer!
I hope you like and it has been fun and easy to make being in this quarantine.
Huge hug to all of you.
Sandra Ruano.
Fabrics we will need for the next block on Monday 27th April:
We hope to see your creations in our group on Facebook.
See you on Monday!
VERSIONE ITALIANA:
Di nuovo ciao!
Sono Sandra Ruano e oggi vi presento la quarta puntata del Mistery Quilt by Komola Kraft. Proseguiamo con la stessa emozione e intrigo del primo blocco.
Credo che abbiate già un’idea di come ci unisce il cucito ?
Quarta puntata del Mistery Quilt by Komola Kraft: Rimani a casa
Nella quarta puntata andiamo a lavorare con una tecnica per tutte molto cosciuta e che alcune di voi ha già utilizzato precedentemente in altre puntate del nostro mistery: la tecnica a punto festone a mano o a macchina.
Per questo blocco possiamo lavorare in centimetri o in pollici. La sua misura è di 10cm x 10cm o 4”x4” e il protagonista è un cutter.
Questo blocco lo faremo due volte uguali, (si, si uguali) e vi dirò come girare uno dei due perchè possa sembrare che lo abbiamo fatto a specchio.
Prima di elencare il materiale necessario, vogliamo che teniate in considerazione che alle misure dovete aggiungere sempre i margini di cucitura altrimenti non coincideranno:
- Tessuto di fondo – Due pezzi di stoffa da 10cm x 10cm o 4″x4″.
- Manico – Due pezzi da 8cm x 4cm o 3¼” x 1½”.
- Cerchio di circonferenza grande – Quattro pezzi da 4cm x 4cm o 1½’’ x 1½’’.
- Cerchio medio – Due pezzi da 3cm x 3cm o 1¼’’ x 1¼’’.
- Cerchio piccolo – Due pezzi da 1cm x 1cm o ½’’ x ½’’.
Di seguito, il cartamodello, senza margini di cucitura.
In primo luogo, ricalchiamo i pezzi nell’Heat and Bond o altra carta termo-adesiva dai due lati che abbiamo in casa, senza i margini di cucitura. Una volta ritagliati, li attacchiamo sul rovescio del tessuto e li tagliamo sulla linea del cartamodello. Con questo abbiamo i pezzi separati. (Vedi le immagini 1, 2, 3).
A questo punto posizioniamo ogni pezzo nel suo posto a formare il cutter, lo stiriamo in modo da incollare i pezzi. (Vedi immagine 4).
Adesso applichiamo il cutter sulla stoffa di base, utilizzando il trucco che vi ho insegnato nel video del primo blocco. Poi lo stiriamo e otteniamo i due blocchi uguali. (Vedi le immagini 5, 6).
Il trucco che vi ho menzionato prima è che il blocco di destra lo giro verso la destra e già ottengo il blocco a specchio. (Vedi le immagini 7, 8).
Abbiamo già i blocchi pronti per fare le cuciture a punto festone che sia a mano o a macchina. Se la vostra macchina non ha il punto festone, come la mia, ho fatto l’applicazione del cutter cucita con uno zig-zag, oppure potete fare un punto decorativo. Come più vi piace! (Vedi immagine 9).
Spero vi piaccia il risultato, vi sembri bello e facile da fare in questo momento di isolamento.
Un abbraccio a tutte.
Sandra Ruano.
Tessuti per il blocco del prossimo lunedì 27 aprile:
– 30 cm x 110 cm di un colore.
– 3 tessuti di 20 cm x 110 cm ciascuno dello stesso colore ma con una tonalità scura, media e chiara per ottenere una sfumatura.
Sai già che abbiamo creato un gruppo su Facebook per condividere i blocchi realizzati, porre domande e tutto il necessario. Ti aspettiamo lì! Ci vediamo alla prossima puntata!