¡Hola komoler@s!
Soy Eva, profe de iniciación al patchwork en Komola Krafts, y hoy me estreno en el blog de Komola con la quinta entrega Mistery Quilt by Komola.
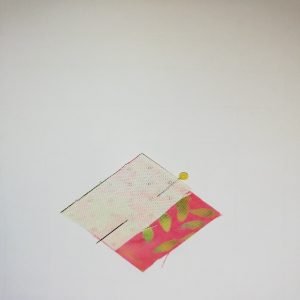
En este bloque vamos a trabajar un patchwork muy tradicional y muy conocido: el Log Cabin realizado con la técnica de Paper piecing.¿Qué Quilter no ha realizado este patrón, en alguna de sus variantes, alguna vez? ¡¡¡Que levante la mano!!! ;-P
Quinta entrega Mistery Quilt by Komola Krafts
Antes de comenzar, quiero aclara que esta parte del proyecto la podéis realizar tanto a mano como a máquina. Por otro lado, podéis hacerlo calcando el patrón en papel de coser o directamente. Yo he optado por hacerlo sobre papel de coser y a máquina con una puntada corta para así luego quitar el papel con facilidad (una vez finalizado todo el quilt, no lo quitéis antes ya que necesitamos la guía de costura para unir los bloques).
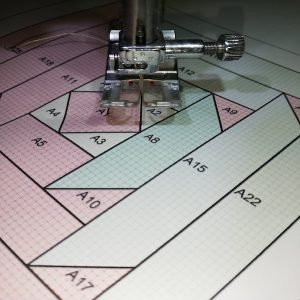
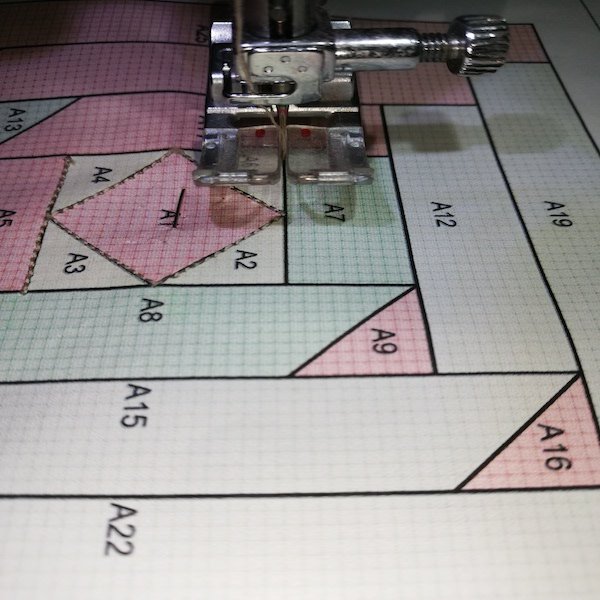
Si optáis por hacerlo con papel de coser, recordad que es muy importante copiar el patrón con mucho cuidado y precisión para no variar las medidas reales. Para ello colocaremos el papel de coser sobre el patrón y lo sujetaremos con alfileres o un poco de celo. Después haremos unas pequeñas marcas en las esquinas y sobre algunos puntos de encuentro para así ser conscientes en caso de que el papel se nos mueva. Trazaremos todas las líneas y pondremos el número de log cabin que le hemos asignado.
Yo siempre recomiendo trabajar creando una leyenda con números en el patrón y en las telas para así facilitar el trabajo.
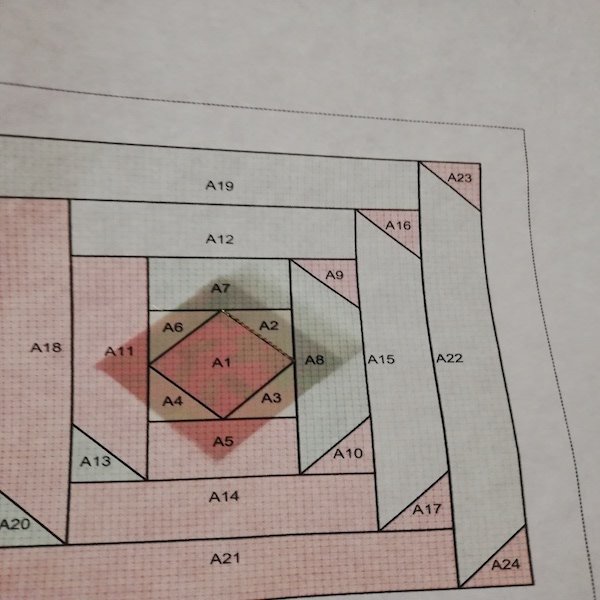
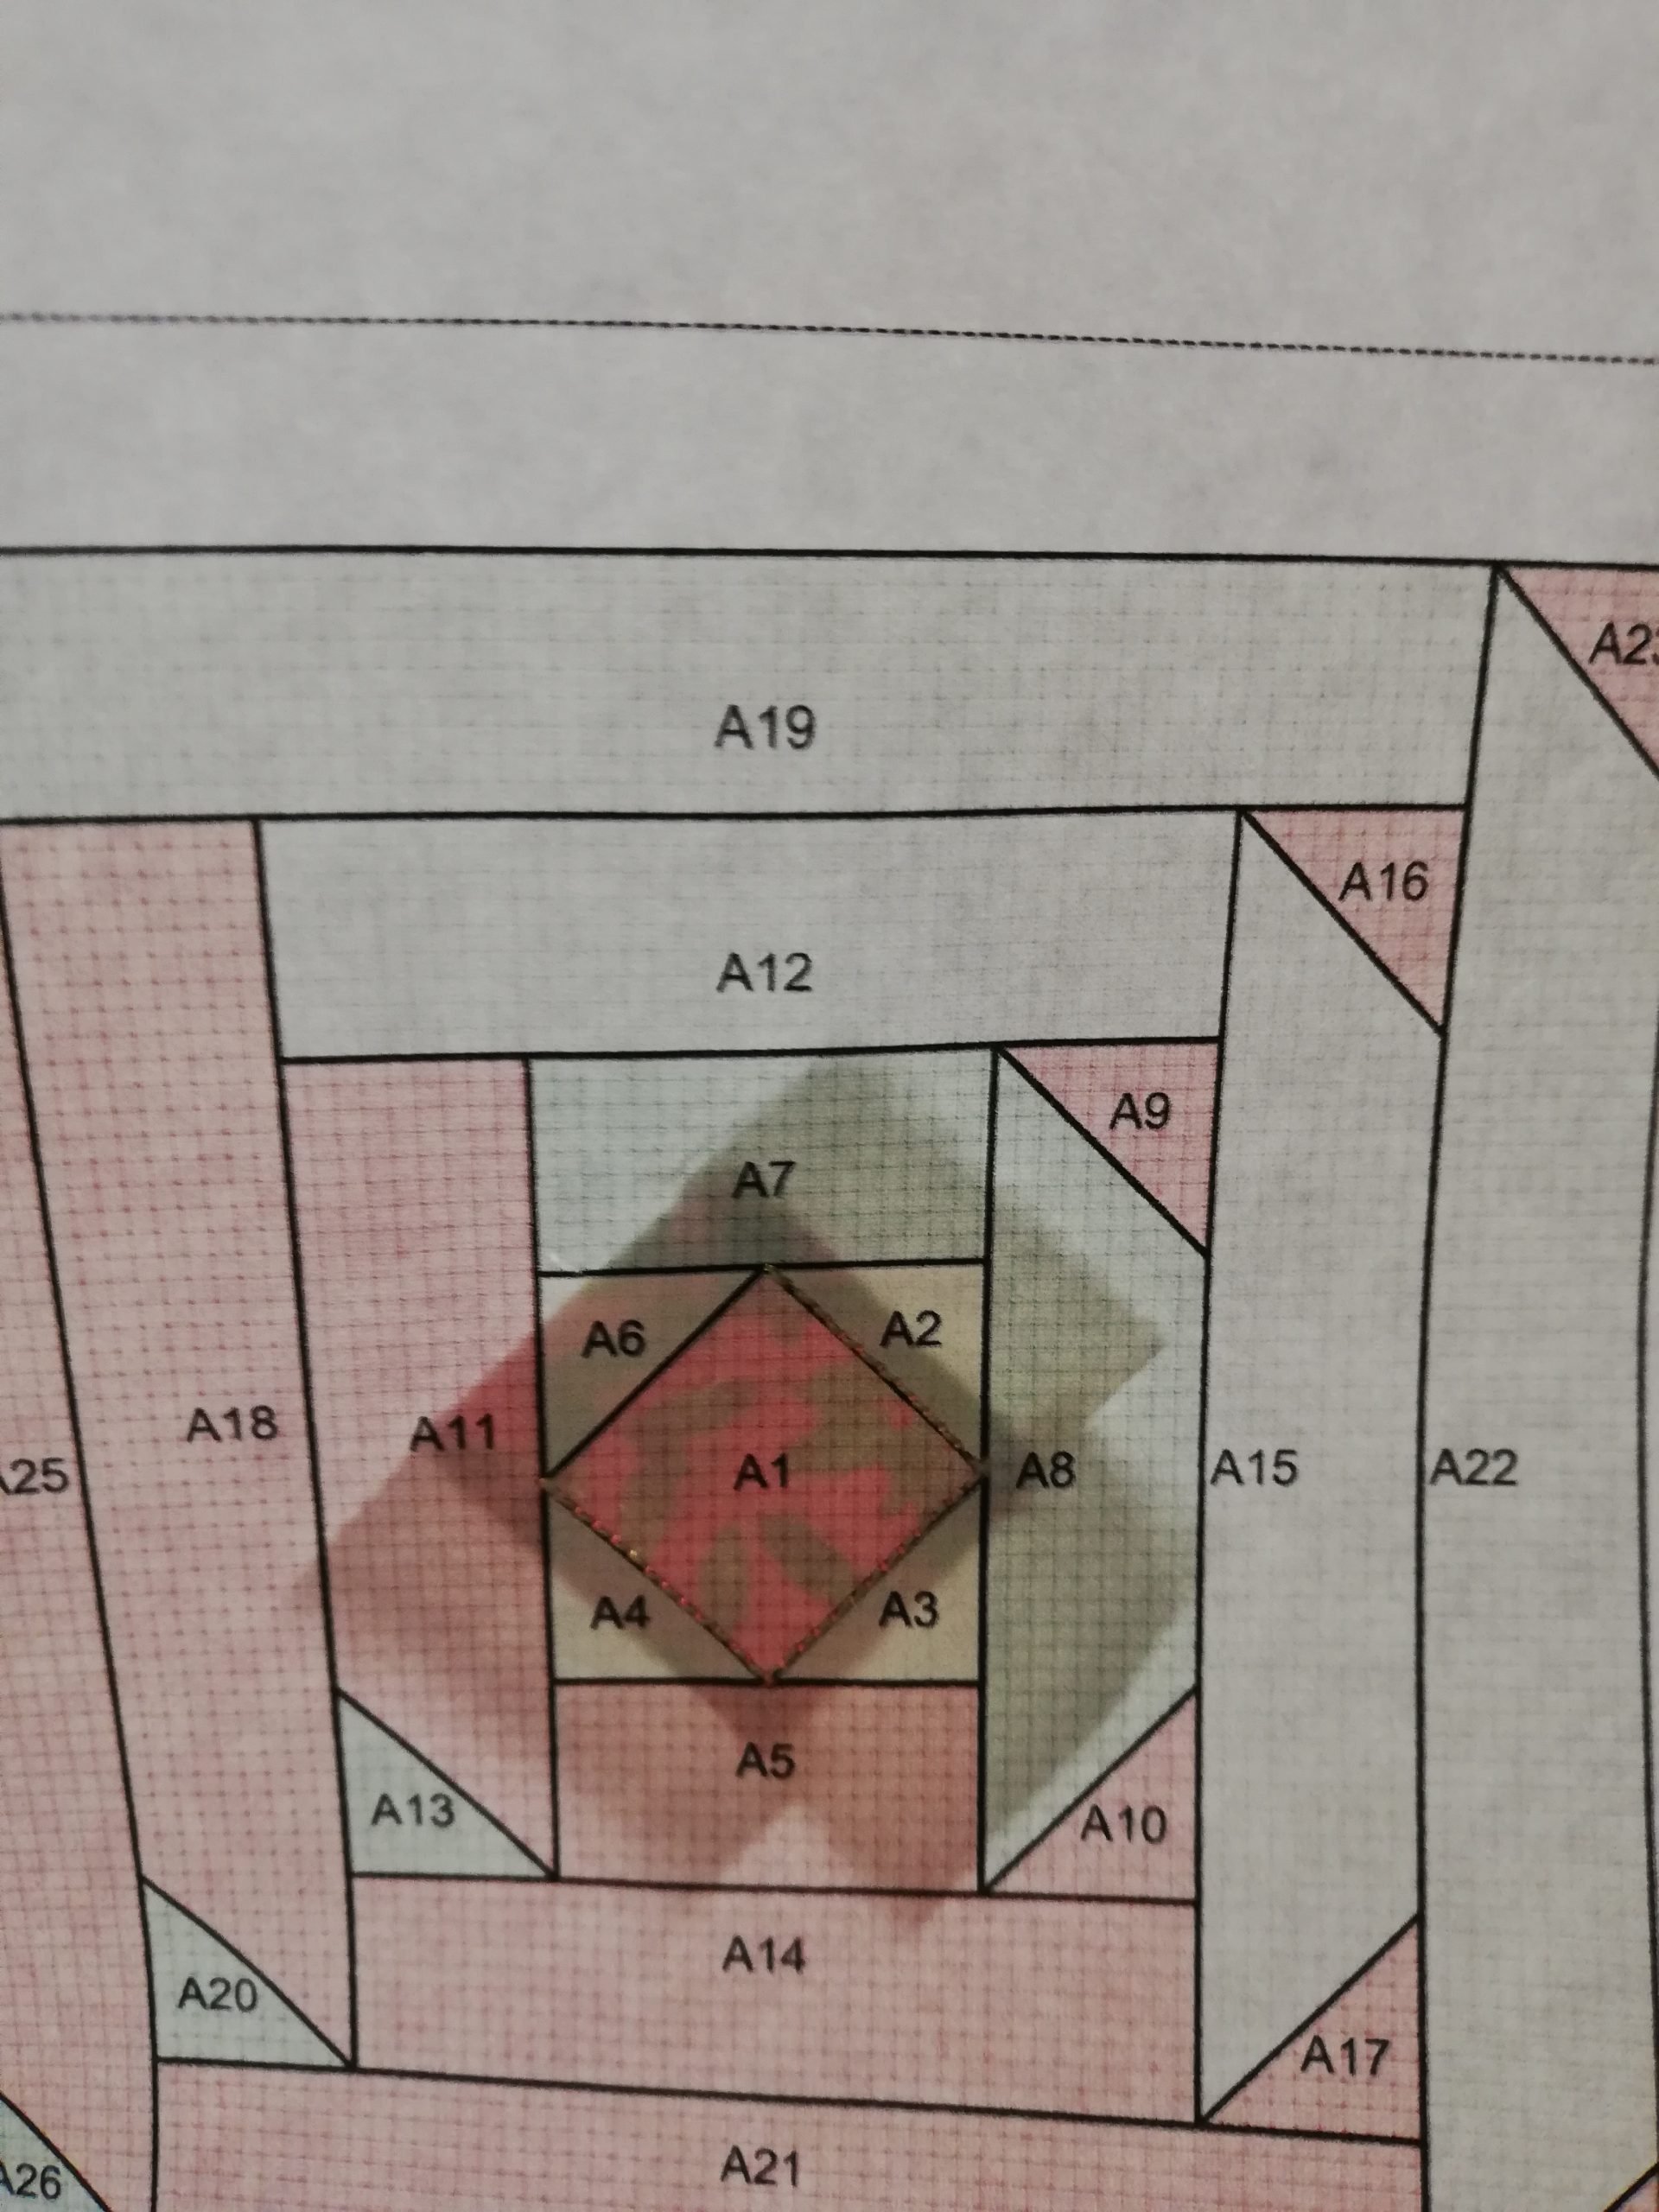
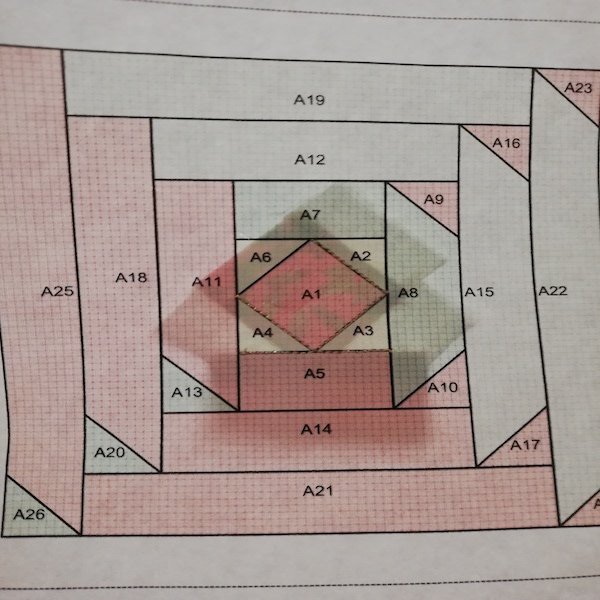
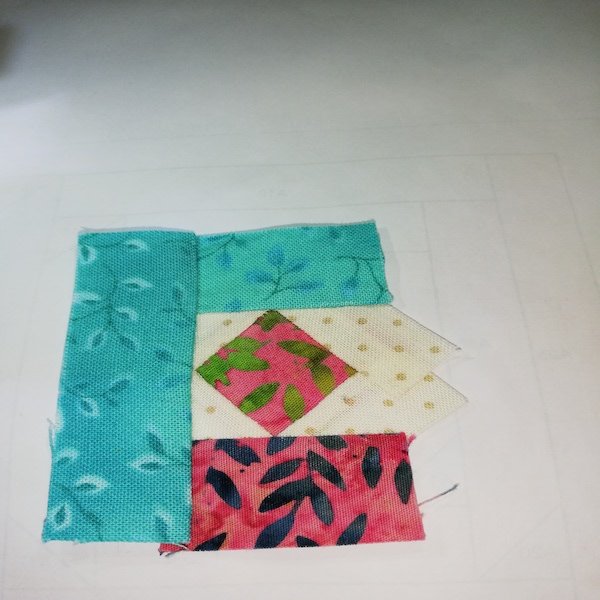
Una vez hecho esto, cortaremos la pieza A1 (el centro) y la A2. Para ello las mediremos (si no nos da una medida exacta, redondeamos al alza para que nos resulte más sencillo) y le añadiremos un margen de costura. ¿Cuánto? Es tan sencillo como poner el margen de costura con el que cada persona se sienta segura.
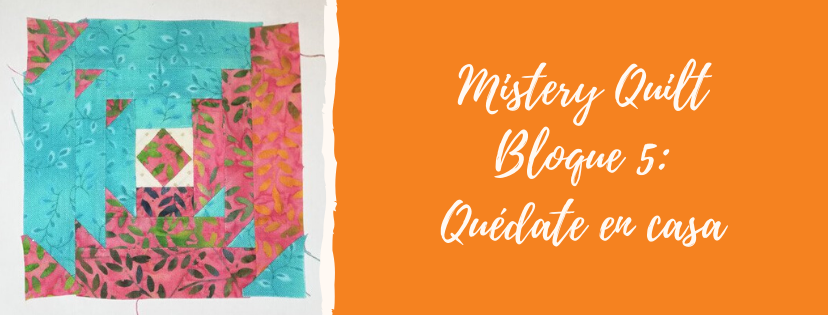
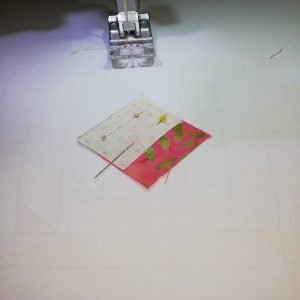
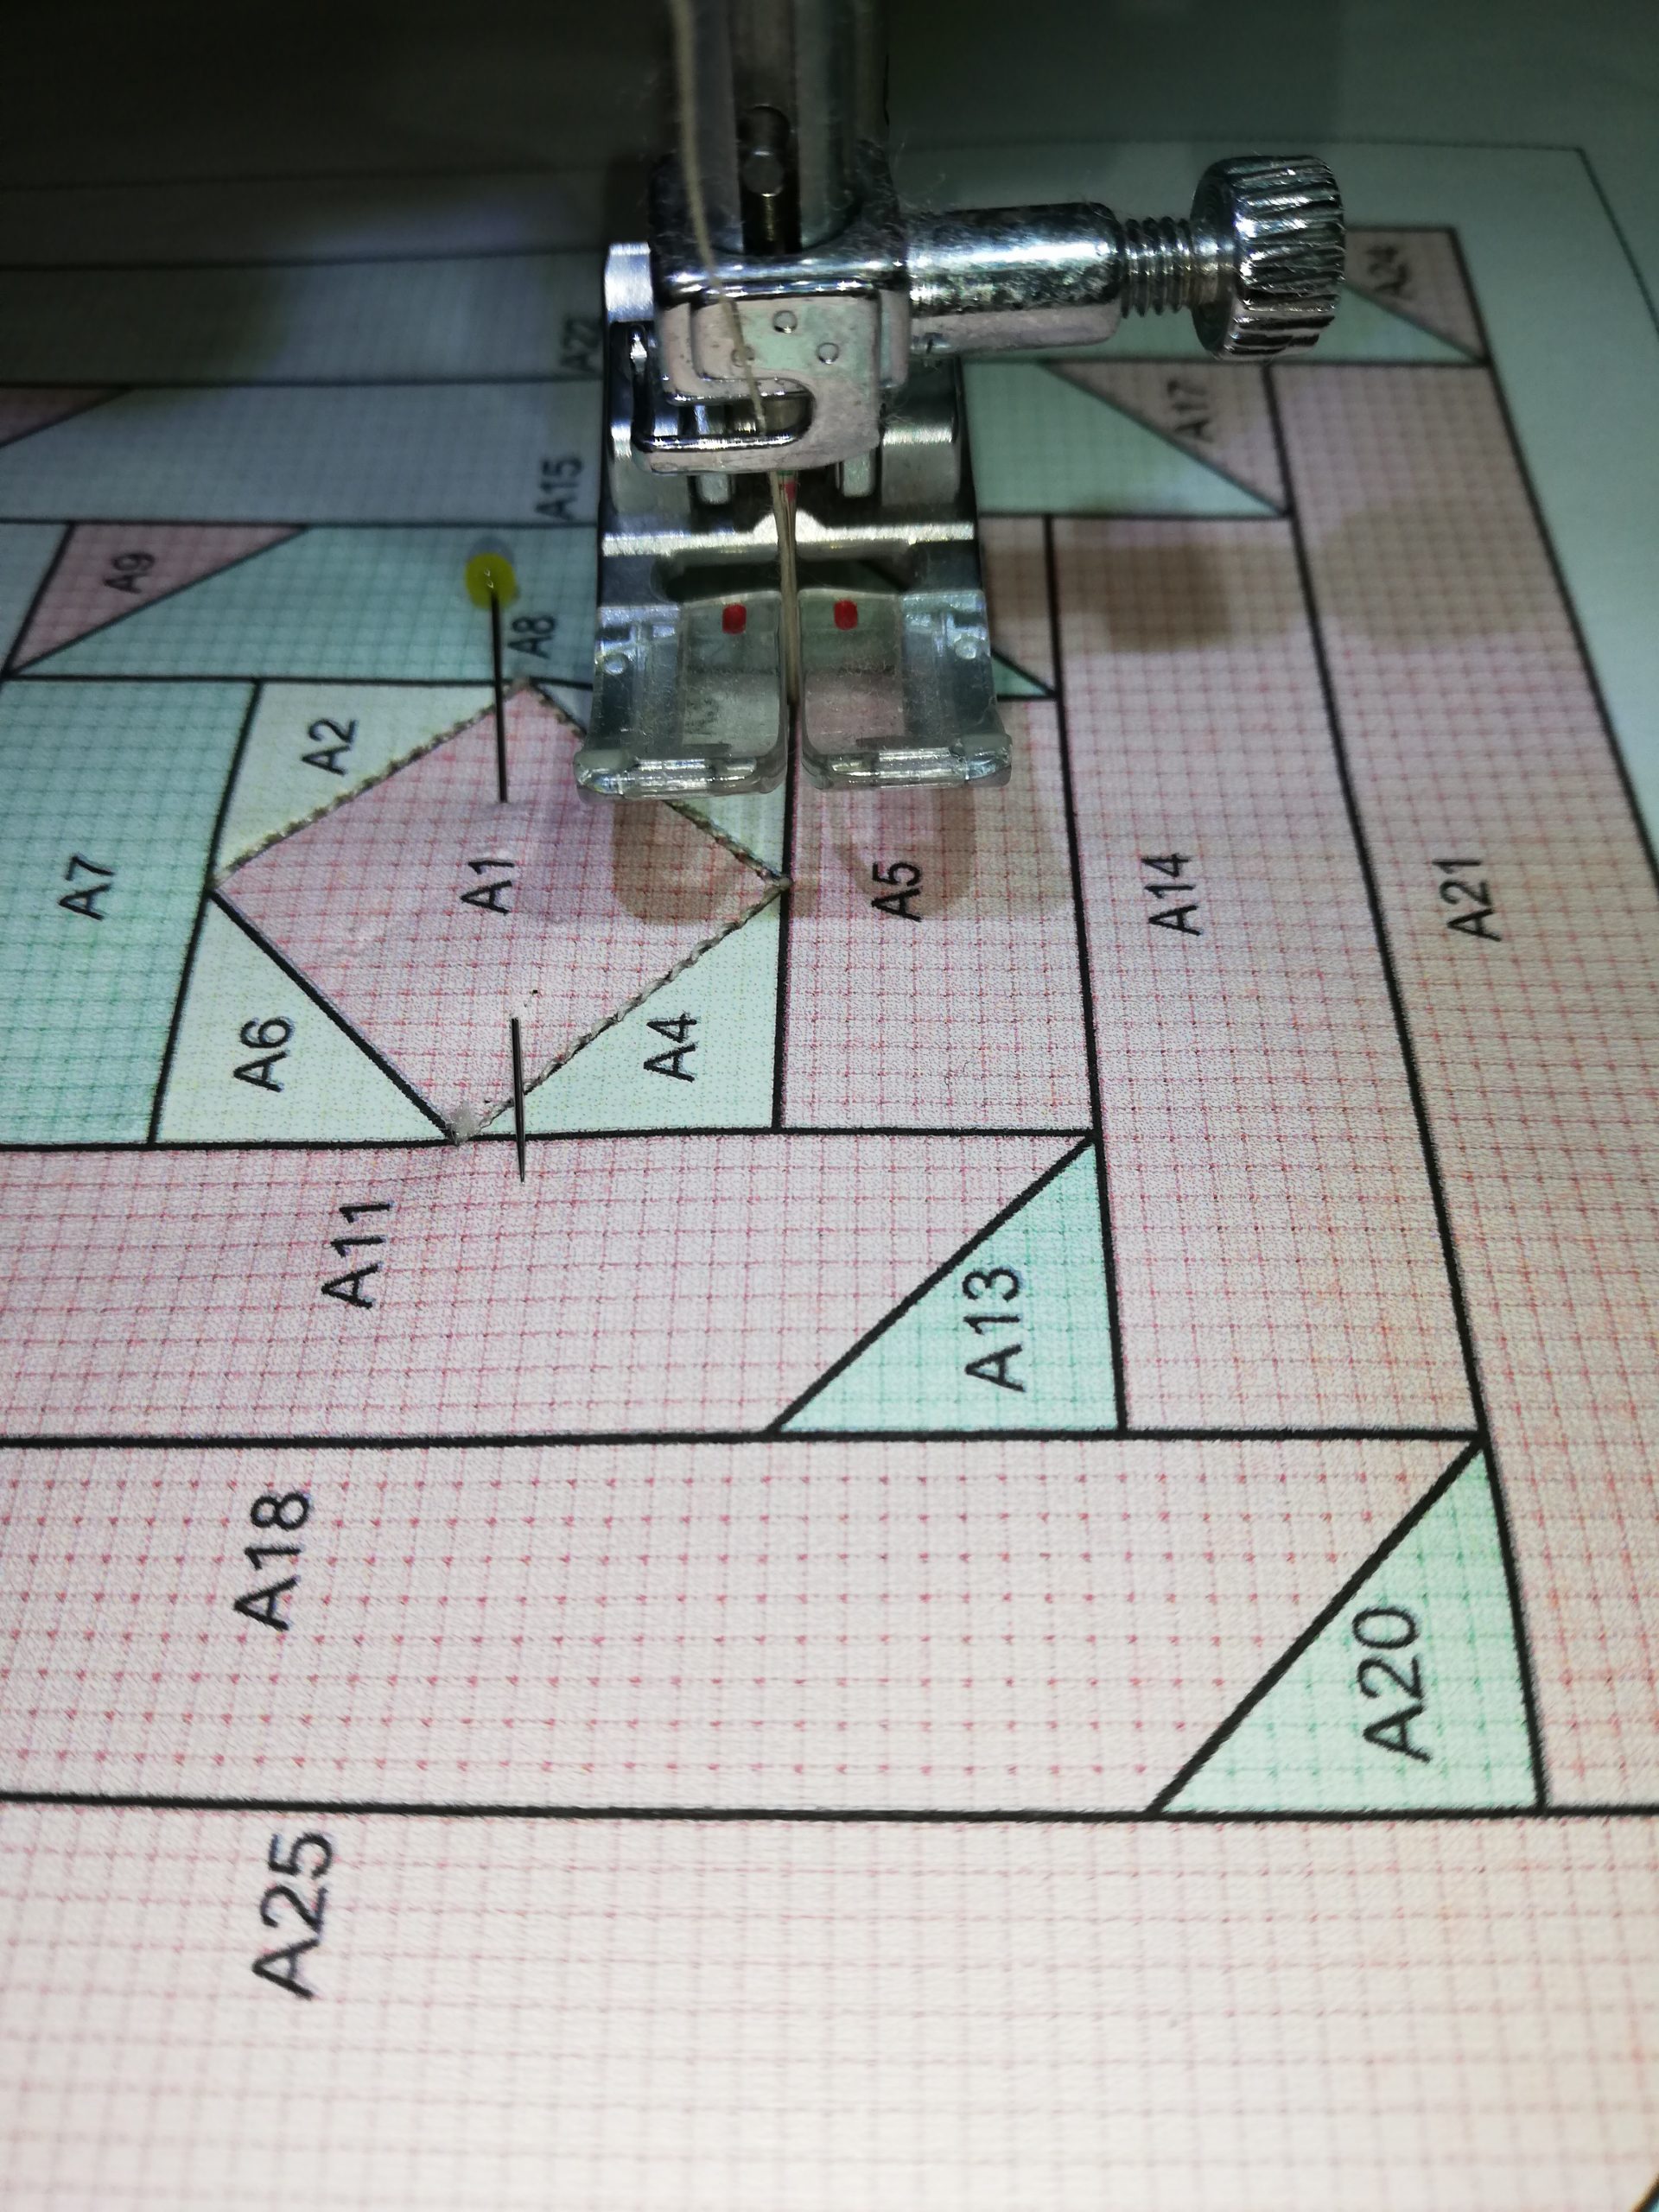
Colocamos la pieza A1. Esta pieza es la única que se coloca al derecho sobre el patrón. Como veis en la imagen, colocamos las telas en el revés del papel, para así coser por la línea dibujada.
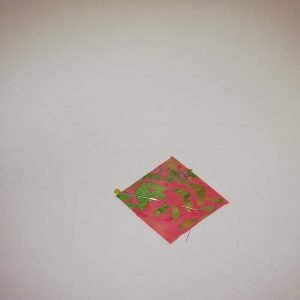
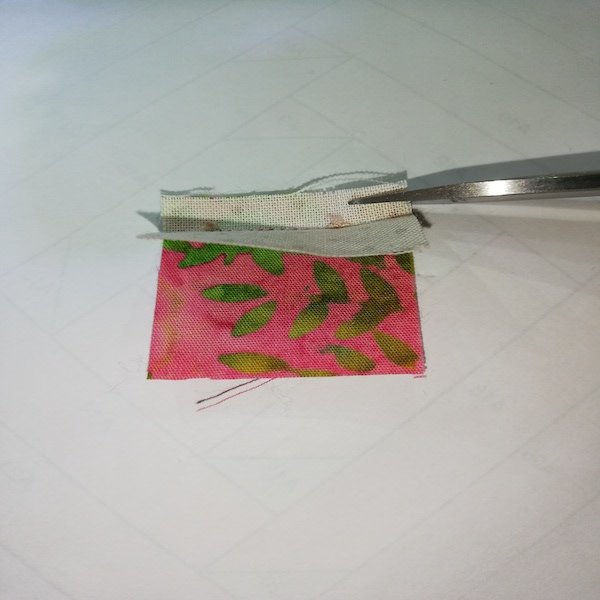
Sobre la pieza A1 colocamos la pieza A2 derecho con derecho. Para facilitar el corte de la tela, yo he cortado un cuadrado de 1,75 cm + margen de costura en lugar de un triángulo. Después sujetamos las telas para que no se muevan con un alfiler fino y cosemos por la línea que separa la pieza A1 y la A2.
Volvemos la tela, planchamos y nos fijamos que la pieza A2 nos cubre y sobrepasa el resto de las líneas de la pieza. Para ello, podemos ayudarnos mirándolo a trasluz.

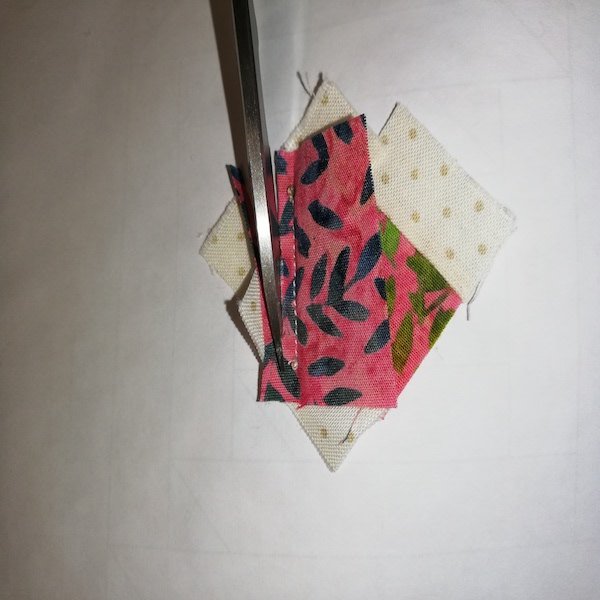
En caso de necesitarlo, cortamos el sobrante de tela del margen de costura.
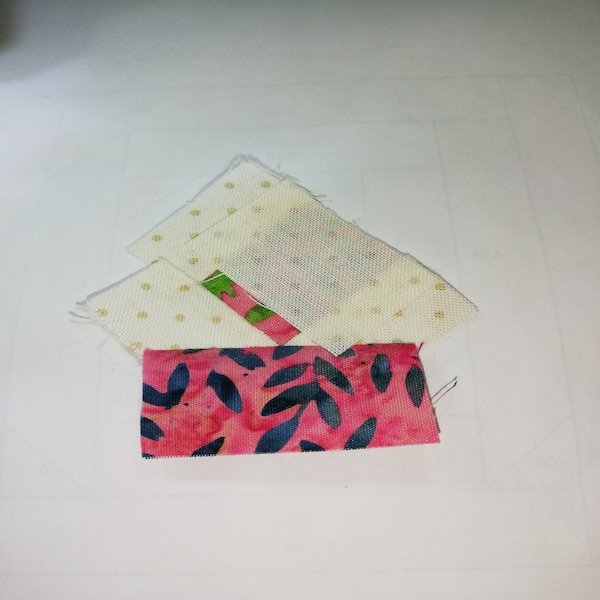
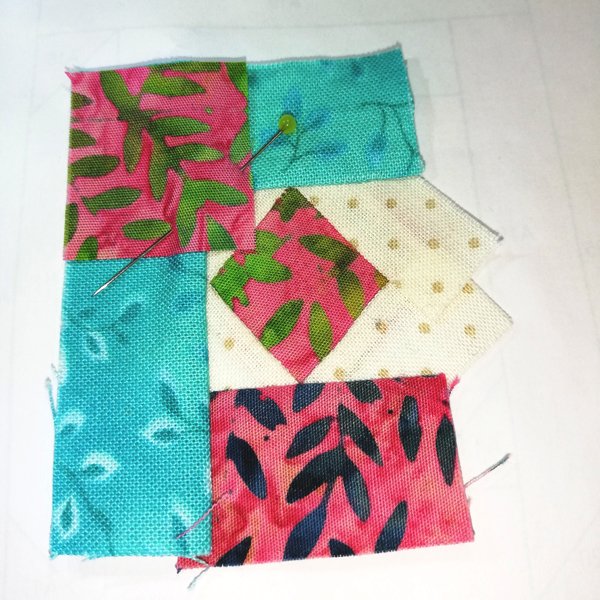
Hacemos la misma operación con las piezas A3 y A4 ya que son iguales que la A2.

Ahora cortamos la pieza A5 y la colocamos derecho con derecho sobre las piezas A3 y A4.

Planchamos, nos fijamos en que cubre todas las líneas de costura y cortamos el sobrante de tela del margen de costura en caso necesario.
Ahora cosemos la pieza A6 igual que hicimos con la A2, A3 y A4.
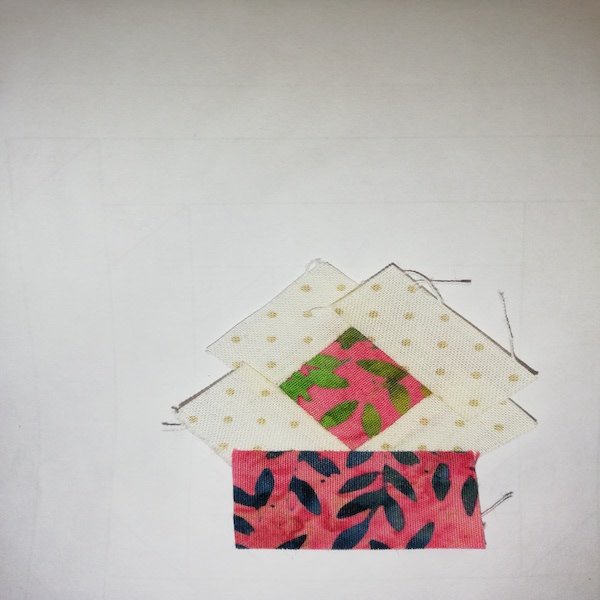
Al igual que con la pieza A5, cosemos la pieza A7 por la línea que la une a las piezas A2 y A6 y la A8 por la línea que la une a las piezas A5, A3, A2 y A7.
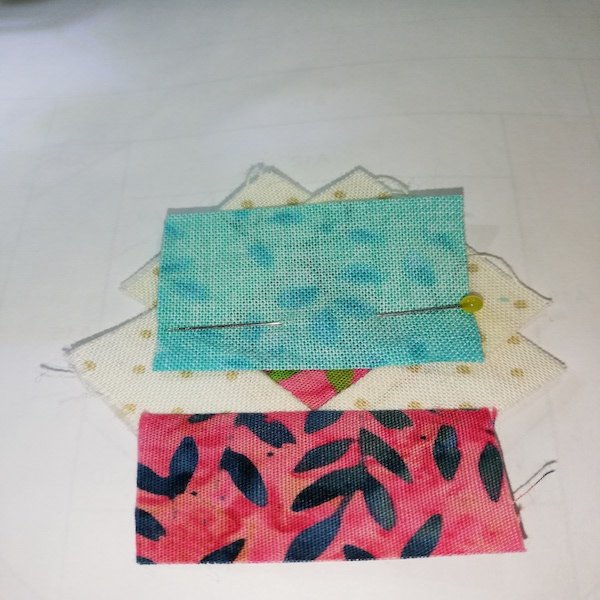
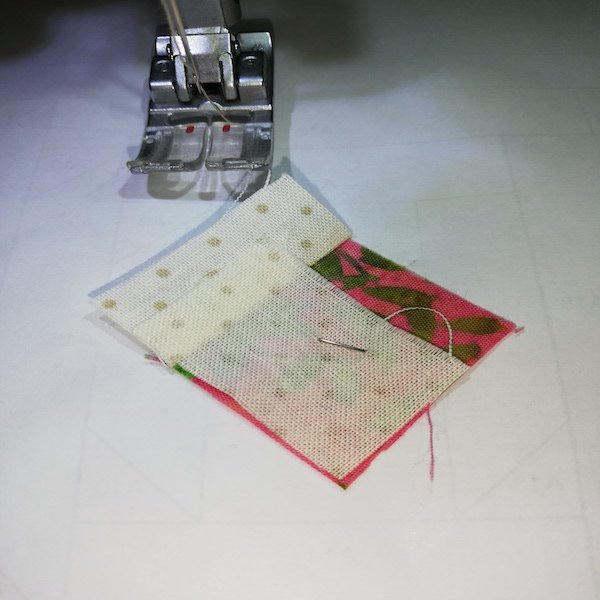
Para la pieza A9, al igual que con los triángulos centrales, os recomiendo que cortéis un cuadrado que mida de lado lo mismo que el ancho de las tiras (es decir, 1,25 cm + margen de costura) en lugar de un triángulo ya que resulta mucho más sencillo. A continuación, una vez cortado el cuadrado, lo situamos derecho con derecho sobre la pieza A8 en la esquina (tal y como veis en la primera foto) y cosemos por la línea.
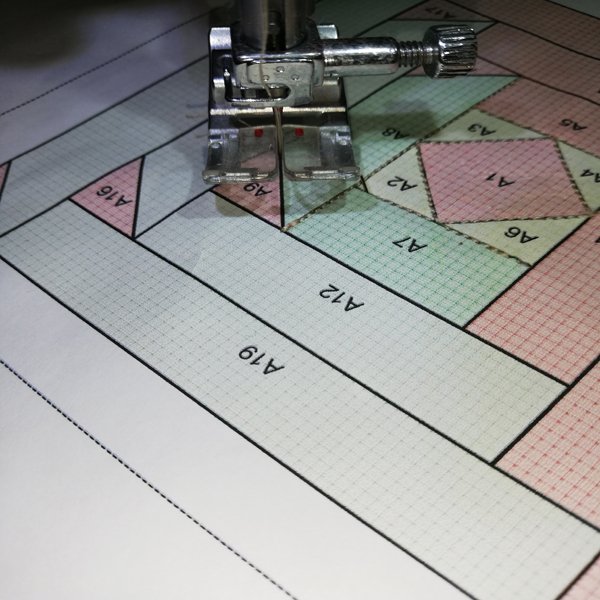
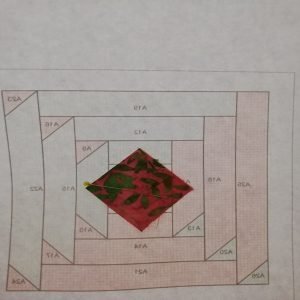
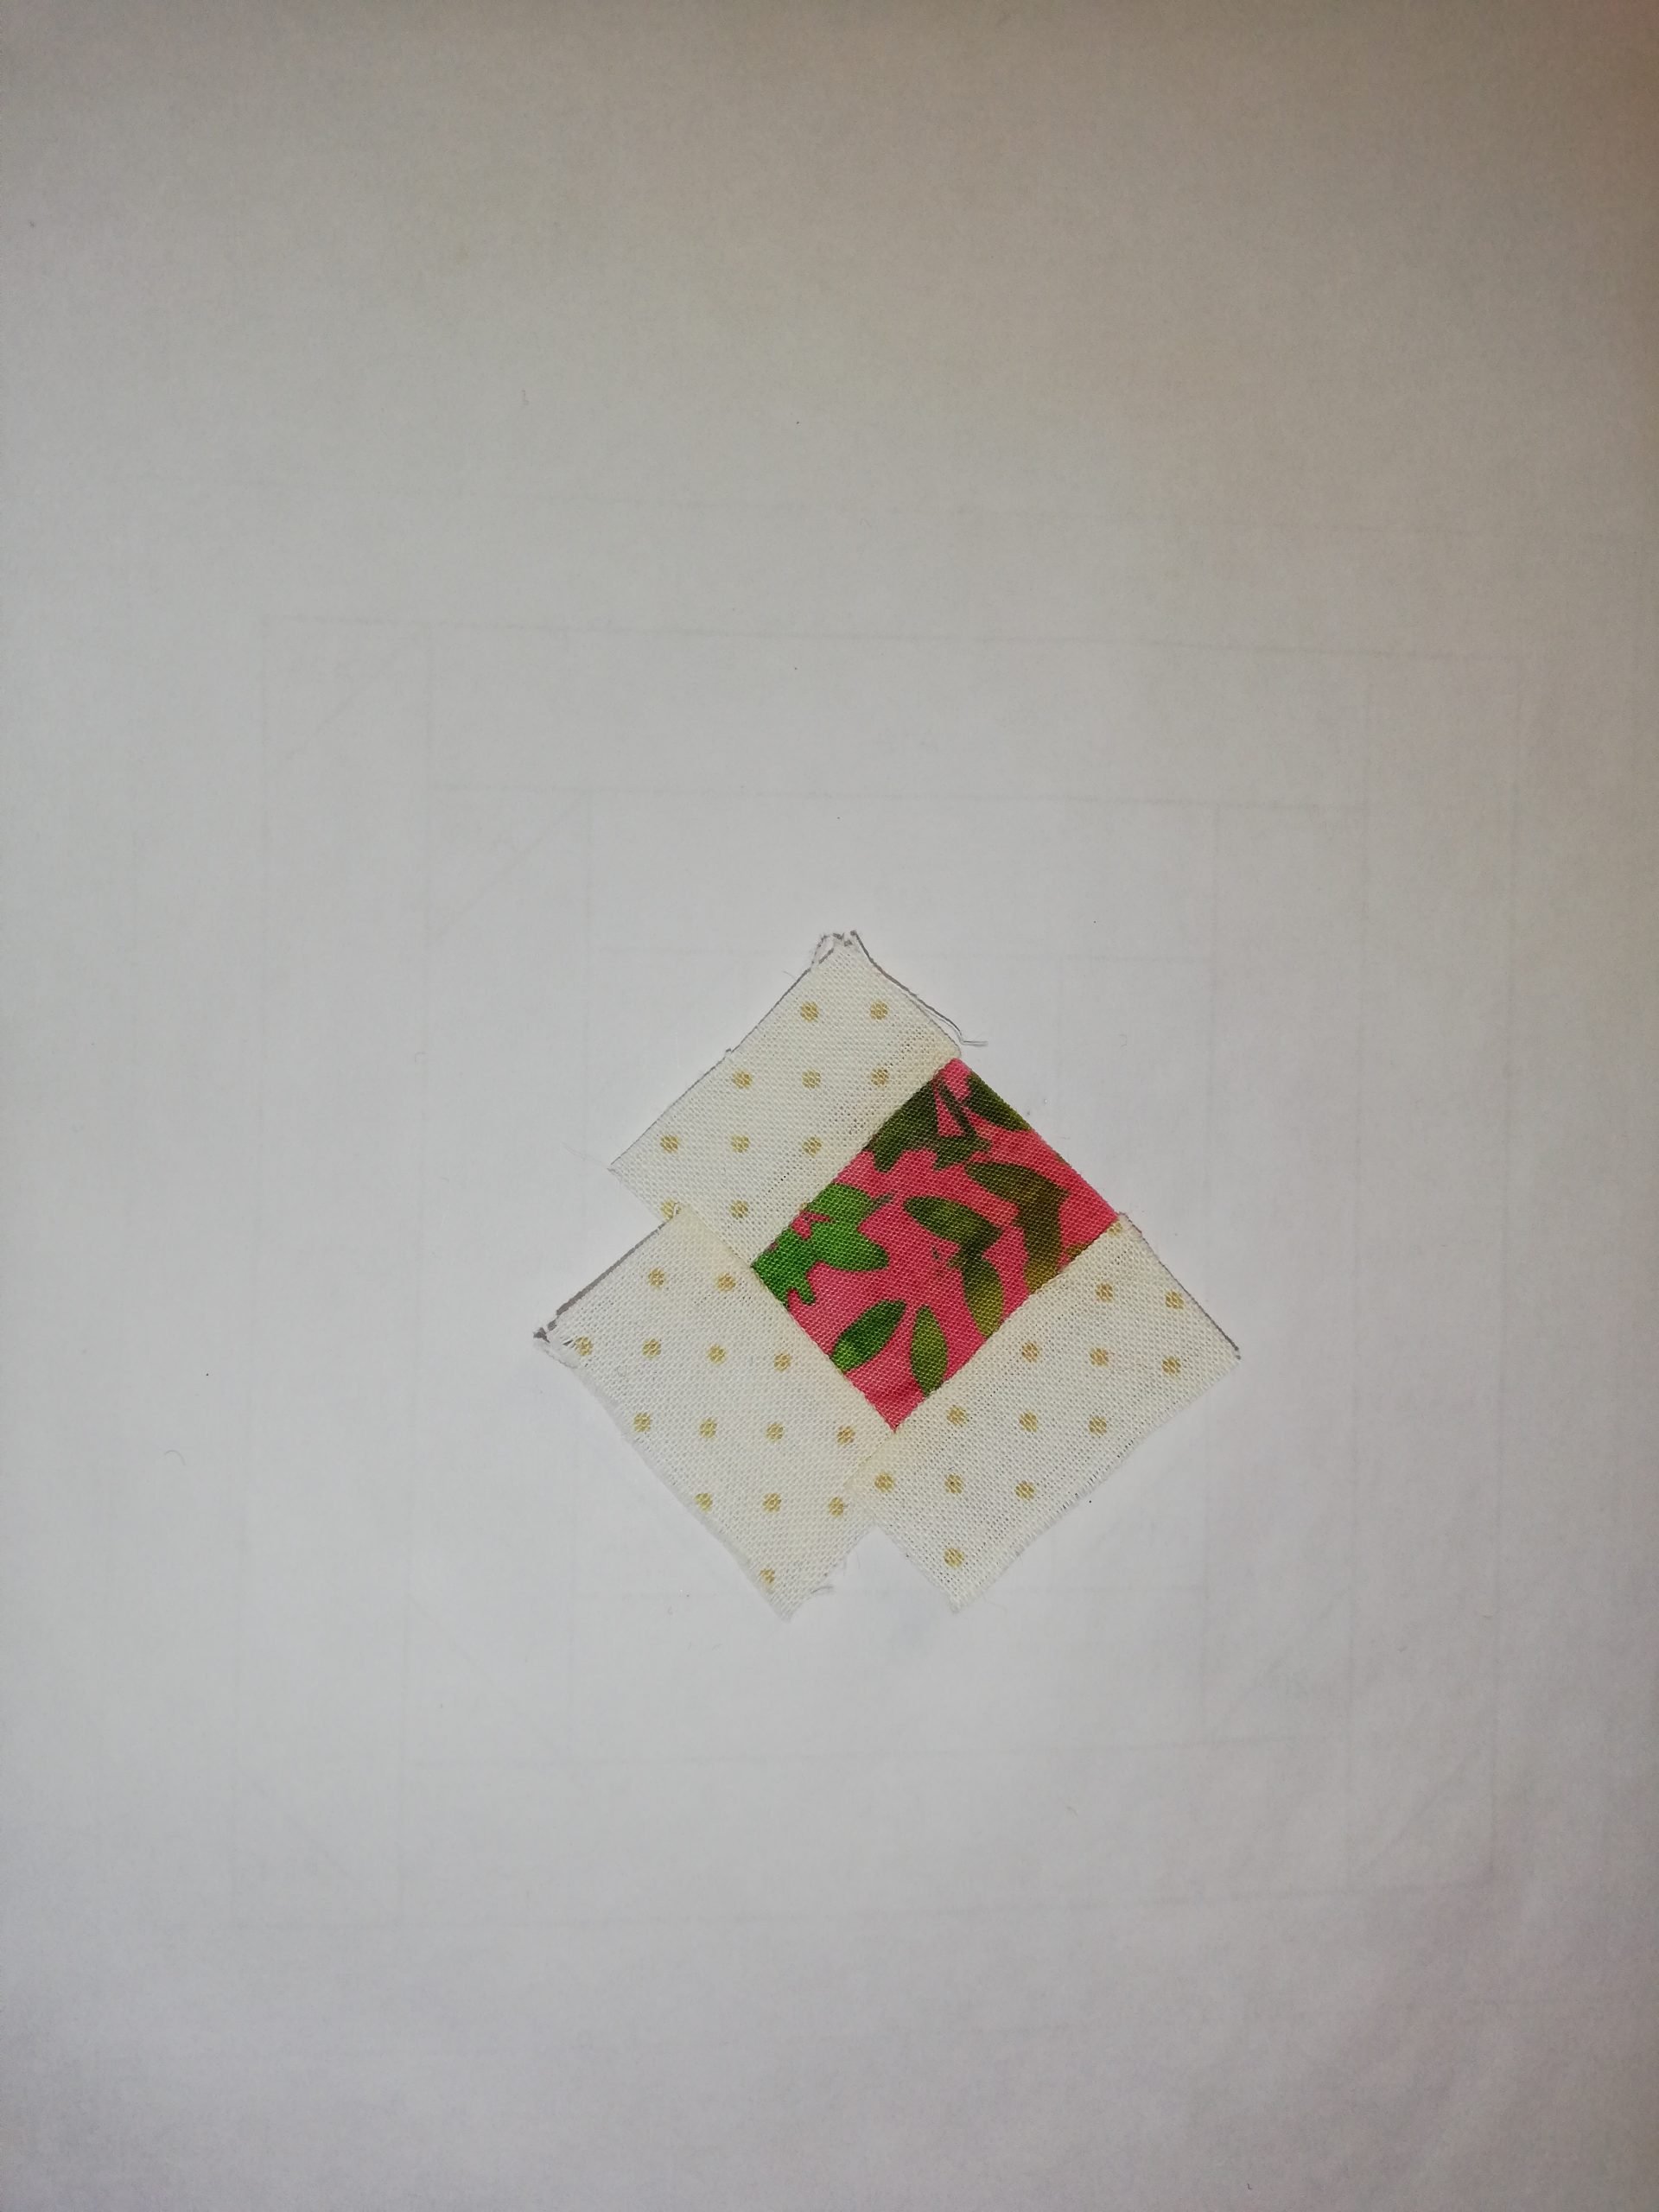
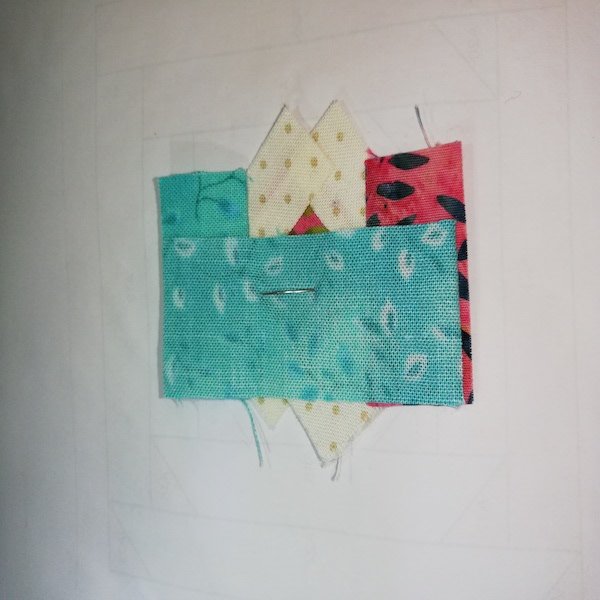
De esta forma, vamos cosiendo todas las piezas en el orden correcto hasta que tengamos cubierto todo el patrón.
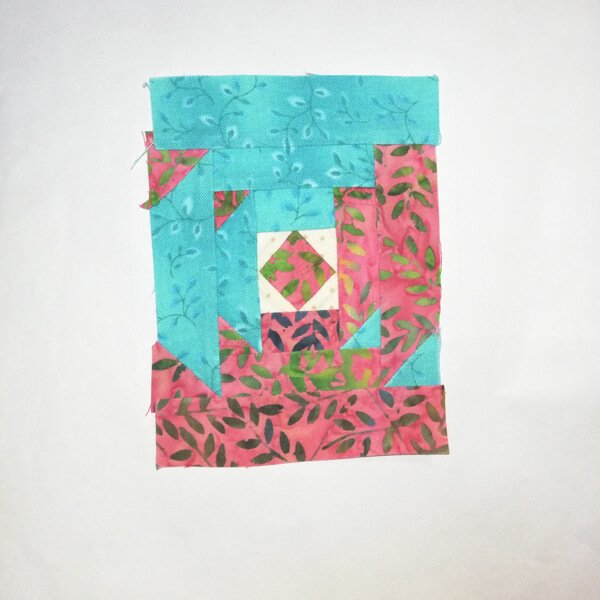
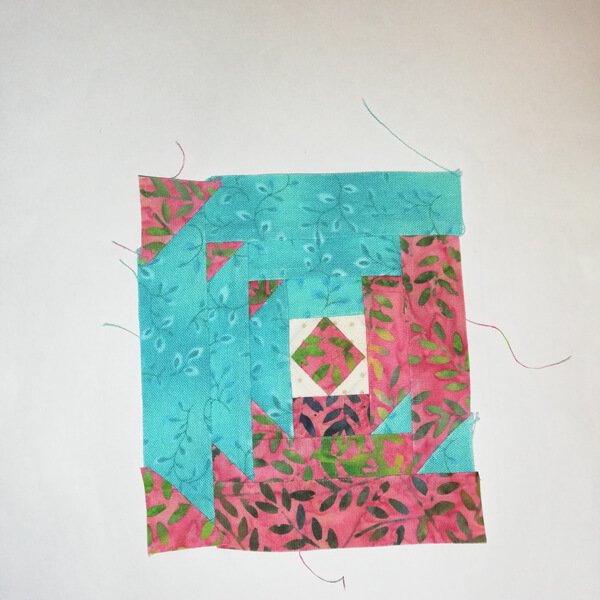

Recordad seguir siempre vuestro patrón y la numeración propuesta. Las fotos del patrón de este post tienen otro orden ya que yo he numerado mi log cabin de otra manera, pero con los que os mandamos, vais a ver el dibujo rápidamente y de manera más sencilla.
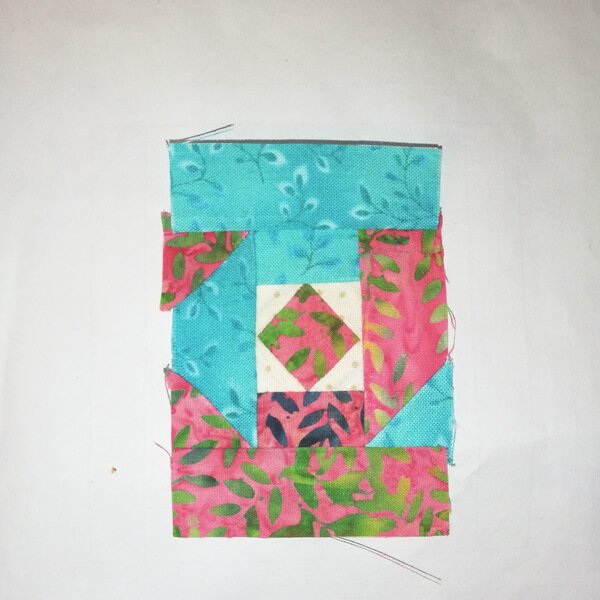
Una vez hecho el primero, los otros 3 serán coser y cantar. Recordad que no podemos quitar el papel ya que lo necesitaremos para unirlos al resto de los bloques. Además, si os fijáis en la parte superior del patrón, cada Log cabin tiene un número que necesitaremos tener localizado para que nos resulte más sencillo el montaje final.
Telas para el bloque del próximo jueves 30 de abril:
Para el próximo bloque podéis usar restos de telas que os hayan sobrado de otras entregas anteriores.
Espero que os haya gustado esta quinta entrega Mistery Quilt.
¡Ánimo! Ya queda menos para ver el resultado de nuestro Mistery 😉
¡¡¡Saludos virtuales!!!
ENGLISH VERSION:
Hey komolers!
I’m Eva, the patchwork initiation teacher in Komola Krafts, and today I debut myself in Komola’s blog with the 5th release of Mistery Quilt by Komola.
In this block we’ll work a very traditional and well known type of patchwork: the Log Cabin made with the Paper Piecing technique. Which quilter hasn’t ever made this pattern, in any of its variants, not even once? Please lift your hand up! ;-P
Fifth release of Mistery Quilt by Komola Krafts: Stay at Home
Before starting I’d like to point out that this part of the project can be made either by hand or by machine. On the other side, you can also do it copying the pattern on sewing paper or directly. I have chosen to make it with sewing paper and with a sewing machine with a short stitch for an easier removal of the paper later on. (Once the quilt is finished, don’t remove it before as we need the drawn patterns to join the blocks.
If you choose to make it with sewing paper, remember that is very important to copy the pattern with a lot of caution and precision so you don’t vary the real measures. For that, we’ll place the paper on top of the pattern and we’ll hold it with a pin or a bit of tape. After that we’ll do some little marks on the corners and on top of some encounter points for us to be conscious in case the paper moves. We’ll trace all the lines and we put the log cabin number we assigned to it.
I always recommend working by creating a legend with numbers in both the patterns and the fabrics for the workflow to be easier.
Once this is done, we’ll cut the A1 piece (centre) and the A2. For this we’ll measure them (if you don’t get an exact measure we round towards the higher for it to be easier) and we will add a sewing margin. How much? It’s as easy as putting the margin that you desire.
We’ll place the A1 piece. This piece is the only one that is placed to the right of the pattern. As you see in the image, we place the fabrics on the back of the paper so we sew through the drawn line. (See pictures 1, 2, 3).
On top of the A1 piece we put the A2 side to side. To make the cutting easier, I’ve cut a square of 1.75cm + sewing margin instead of a triangle. Continuing, we hold the fabrics so that they don’t move with a small pin and we see through the line that separates pieces A1 and A2. (See pictures 4, 5, 6).
We go back to the fabric, we’ll iron and take a look that the A2 piece covers and overpasses the rest of the lines on the piece. To help it, we can look it through backlighting. (See pictures 7, 8).
If necessary, we cut the excess of fabric of the margin. (Picture 9)
We’ll do the same with pieces A3 and A4 as they’re the same as A2. (Pictures 10-13).
Now we cut pieces A5 and we place them side to side on top of pieces A3 and A4. (Pictures 14, 15).
We iron, and take a look that it covers all the sewing lines, and we cut the excess of fabric of the margin if necessary. (Pictures 16, 17).
Then, we sew the A6 piece same as we did with the A2, A3 and A4. (Pictures 18, 19).
Like we did with the A5 piece, we sew the A7 piece through the line that joins the A2 and A6 pieces to the A8 through the line that joins the A5, A3, A2 and A7 pieces. (Pictures 20-23).
For the A9 piece, as we did with the central triangles, I recommend you cut a square that is the same measure as the width of the strips (I mean, 1.25cm + sewing margin) instead of the triangle as it is way easier. Next, once the square is cut, we place it side with side on top of the corner in the A8 piece (such as you see in the 1st photo) and we sew through the line. (Pictures 24, 25).
This way, we are sewing all the pieces in the correct order until we have all the pattern covered. (Last 4 pictures)
Remember to follow your pattern and the numbering that’s proposed. The pattern photos of this post have another order because I have numbered mi log cabin in another way , but with the one we send you, you’ll se the drawing quickly and in an easier way.
Once the first is done, the other 3 would be easy as pie. Remember we can’t remove the paper as we’ll need it to join to the rest of the blocks. Furthermore, if you pay attention to the upper part of the patter, every Log Cabin has a number that we’ll need to have located so it’s easier for the final assembly.
Fabrics for the block on Thursday 30th of April
For the next block you can use the remaining fabrics from previous releases.
I hope you really enjoyed this 5th release of Mistery Quilt.
Virtual Cheers!