Hola chic@s,
Soy Mercedes, profesora de patchwork, de punto y de ganchillo en Komola Krafts. Soy la encargada de presentaros la tercera entrega del “Mistery Quilt by Komola Krafts”y estoy muy ilusionada por ello.
Como podéis comprobar, entre clases y por entretenimiento, no sé vivir sin aguja y telas en mi día a día por lo que participar en el “Mistery Quilt by Komola Krafts” era inevitable. ¡Cómo me gusta compartir esta forma de vida con todos vosotros!
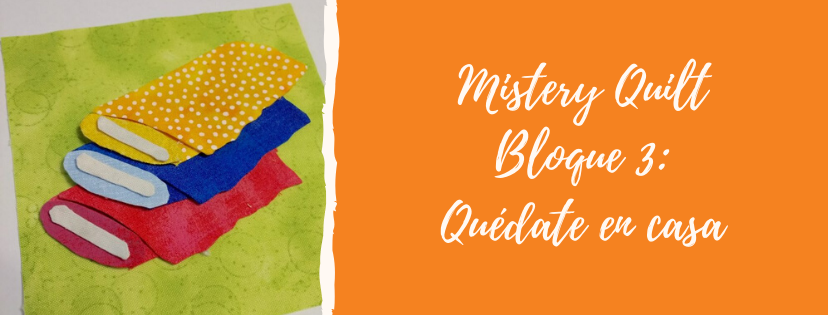
Tercera Entrega Mistery Quilt by Komola Krafts: Quédate en Casa
Con este bloque vamos a trabajar la técnica de apliquick por lo que necesitamos una entretela adhesiva por una cara, un pegamento y unos palitos con los que nos ayudaremos a dar forma a nuestras piezas. Si no disponéis de estos materiales en casa, más adelante os mostramos alternativas; aunque si lo preferís, también podéis utilizar las técnicas que os han ido mostrando mis compañeras en otros bloques.
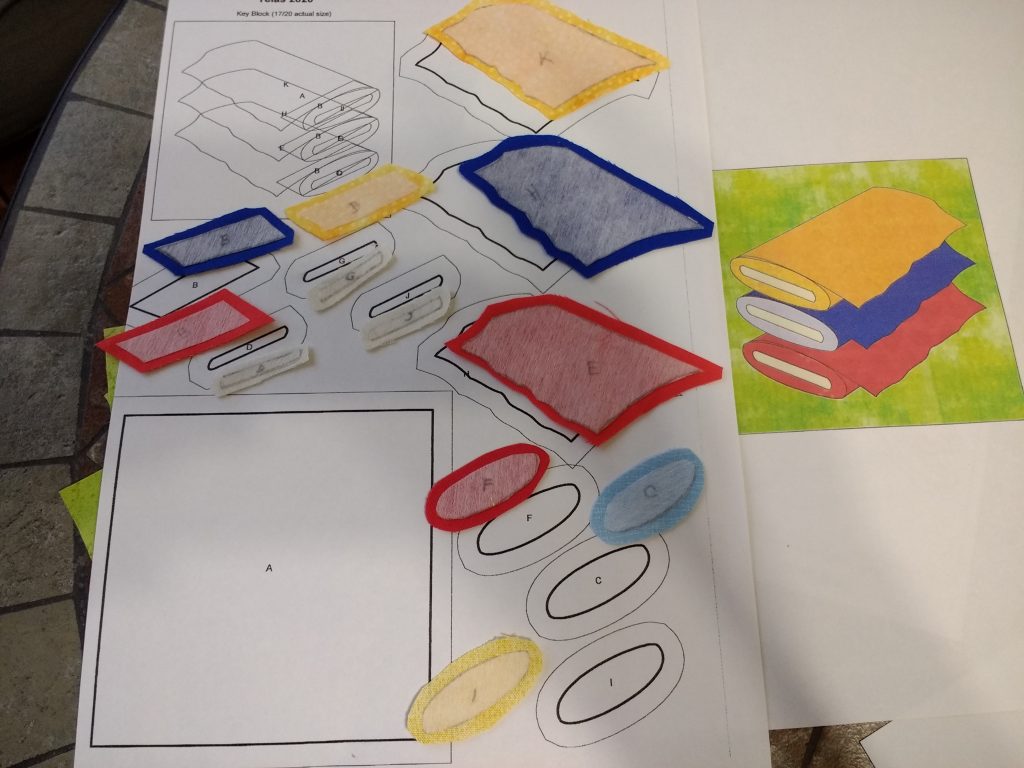
En estos enlaces podéis descargar los patrones que vais a necesitar para este bloque ¡Es muy fácil!
En primer lugar te recomendamos que elijas las telas para cada pieza, realizando las combinaciones que más te gusten y teniendo en cuenta los bloques anteriores. El fondo de este bloque también será de 10×10 centímetros, o 4″x4″. Recuerda que todos los bloques formarán tu Mistery Quilt y tendrán que desprender tu sello personal.
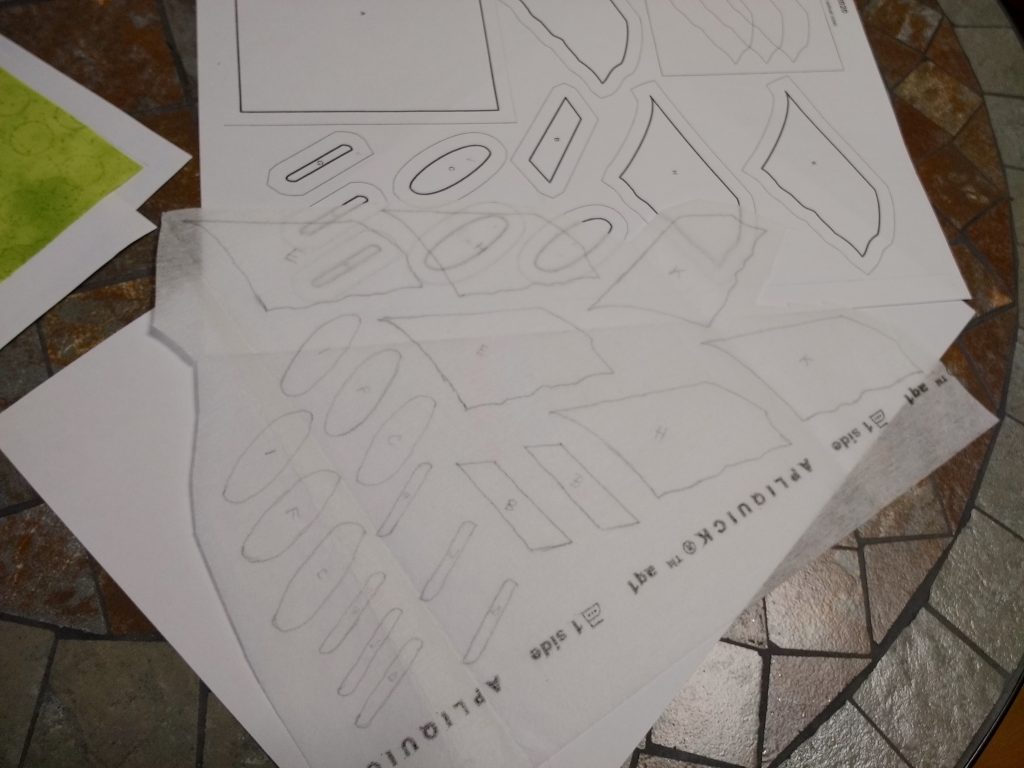
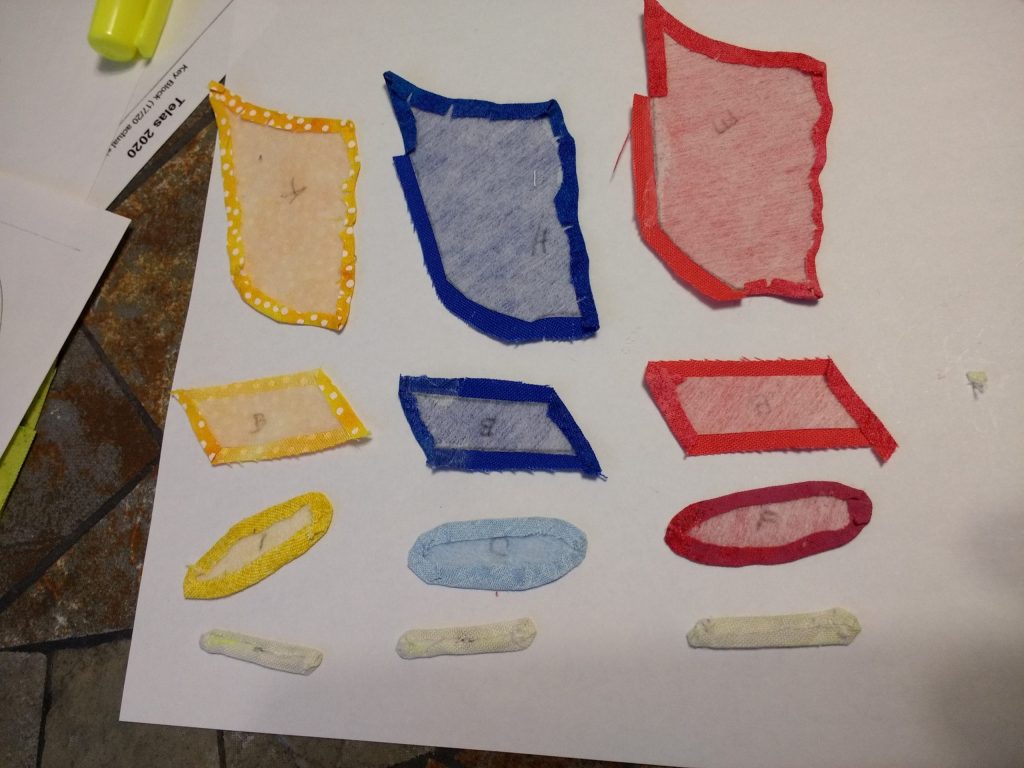
Comenzamos copiando los patrones en la entretela teniendo en cuenta que el trabajo en papel HeatnBond o de Apliquick siempre nos queda invertido, en espejo. En nuestro proyecto final vamos a necesitar cuatro veces este trabajo, dos en cada sentido; es decir, dos de ellos en espejo respecto de los otros dos.
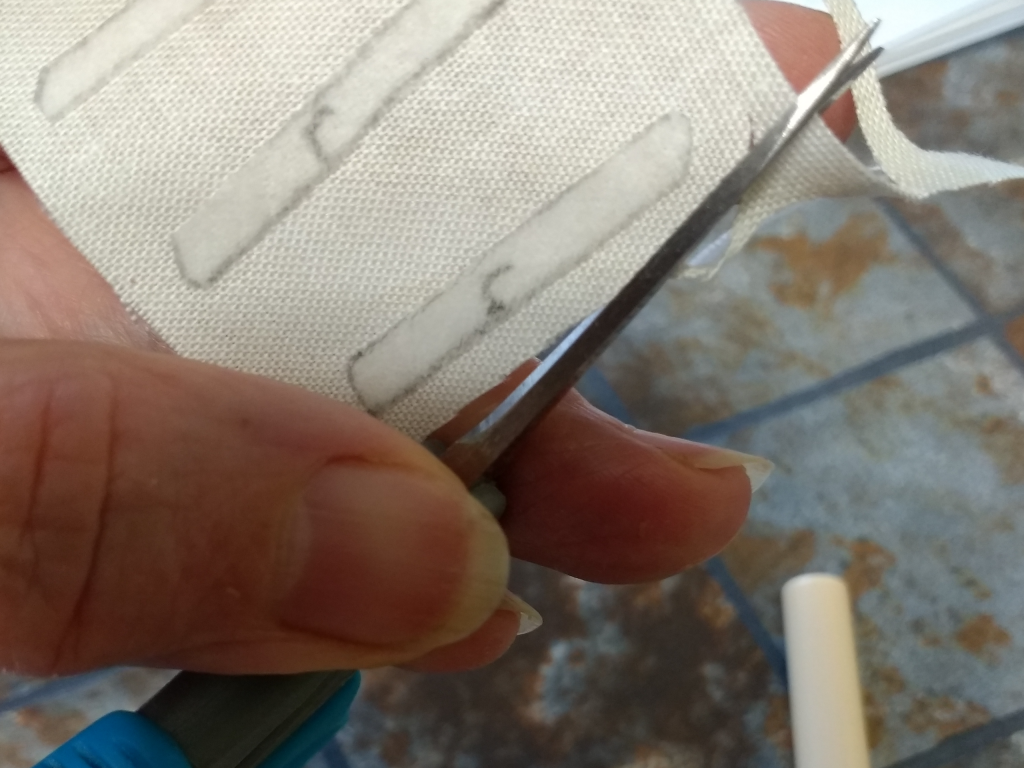
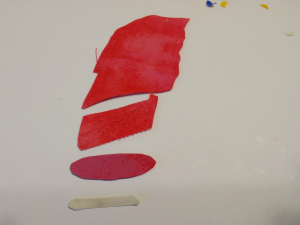
A continuación, recortamos cada pieza resultante de entretela sin margen. Una vez tengamos recortadas las piezas de entretela, las pegamos con la plancha sobre las telas correspondientes y las cortamos, esta vez sí, dejando un margen de unos 3 ó 4mm alrededor de las piezas.
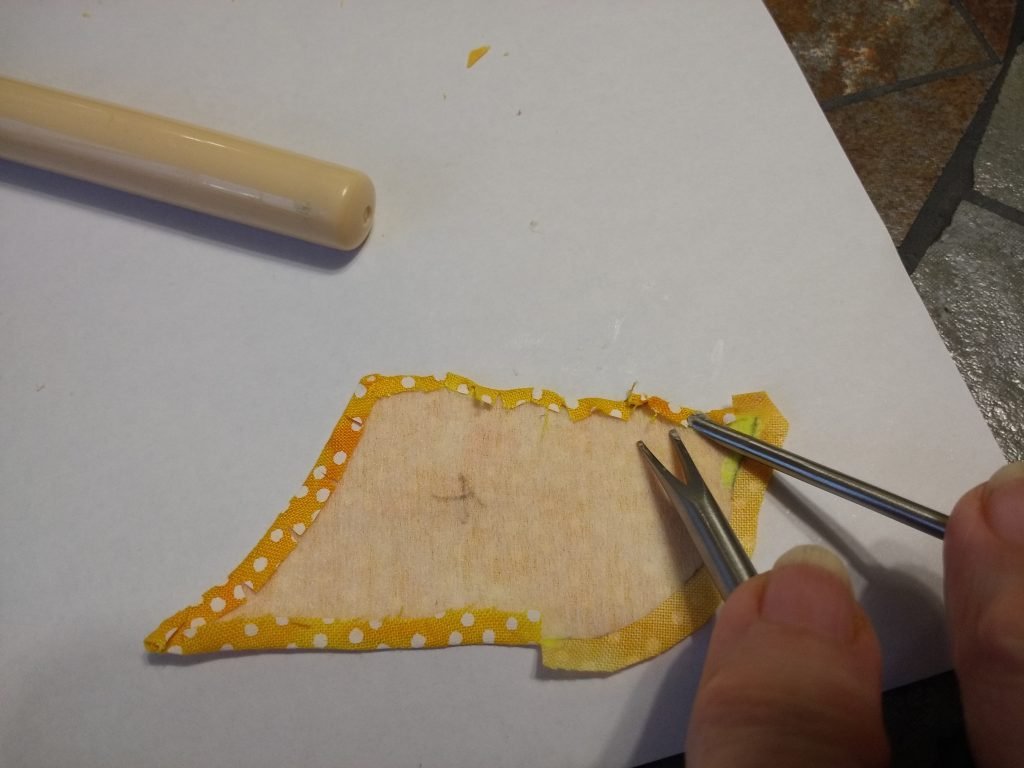
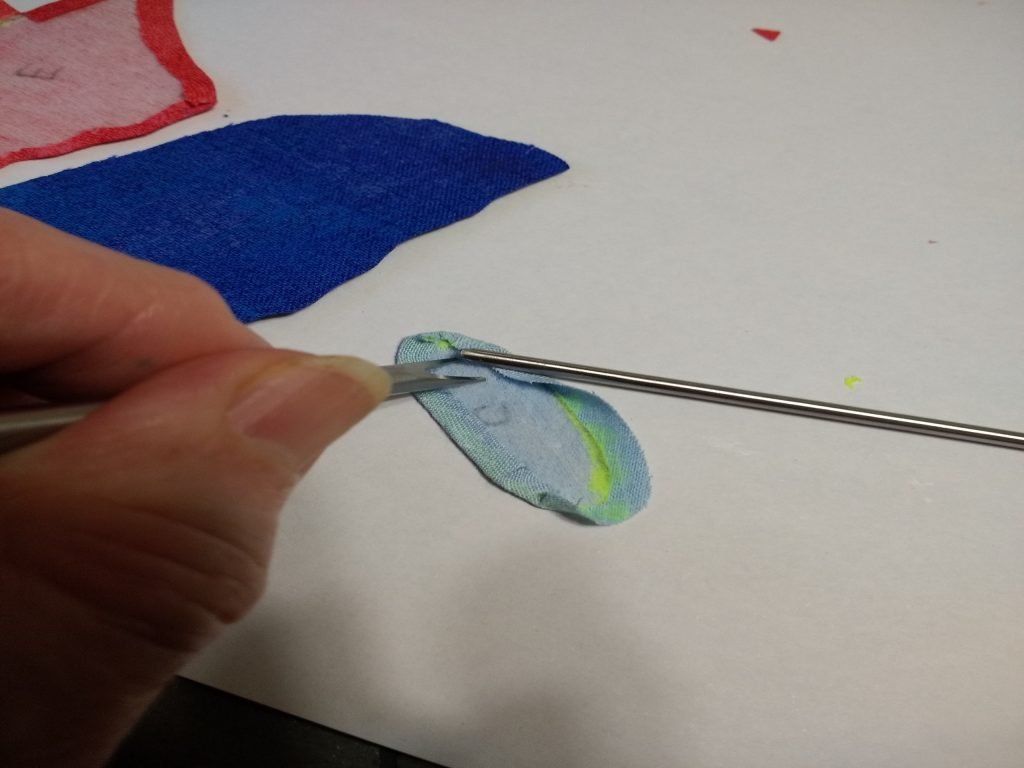
Ahora empezamos a dar forma a las piezas con la ayuda del pegamento y los palitos. Si no disponemos de este material, podemos utilizar un pegamento de barra o incluso cola blanca en poquita cantidad y unos palillos de naranjo o de brochetas.
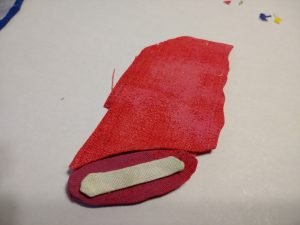
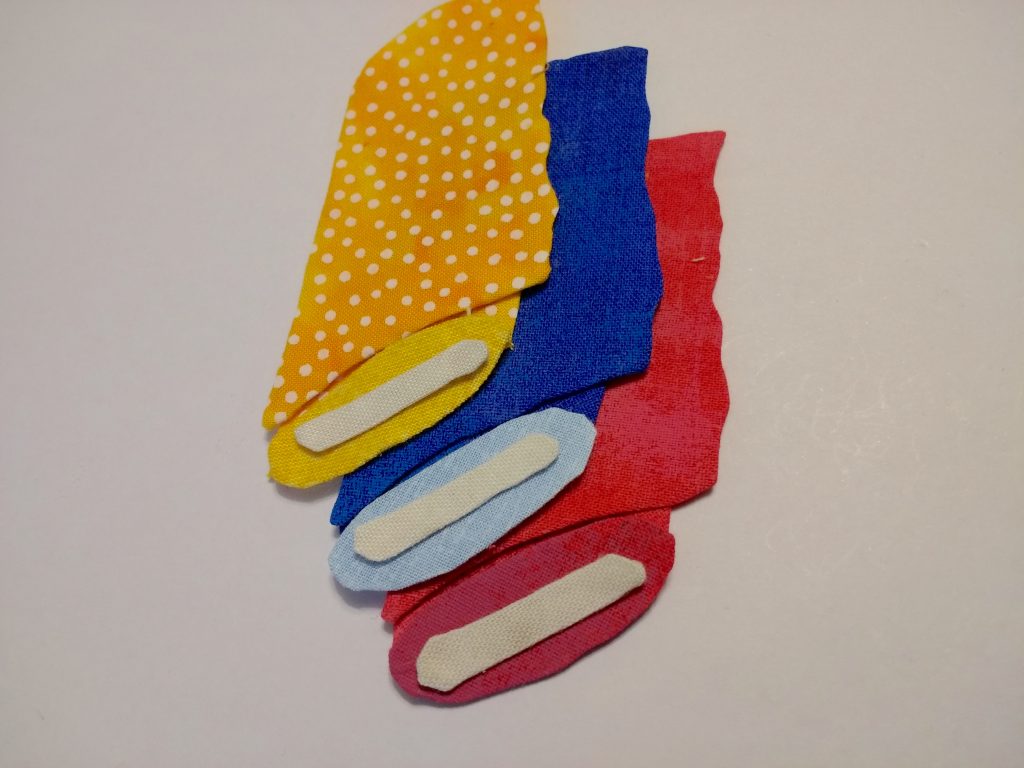
Fijaos que no es necesario volver todos los márgenes, de hecho algunos van escondidos debajo de otras piezas y si van doblados abultarían demasiado.
Cuando estén todas las piezas preparadas, vamos montando cada plegador de forma independiente. Una vez montados, cosemos las piezas a puntada escondidas para formar el rollo de tela completo.
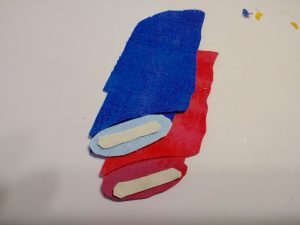
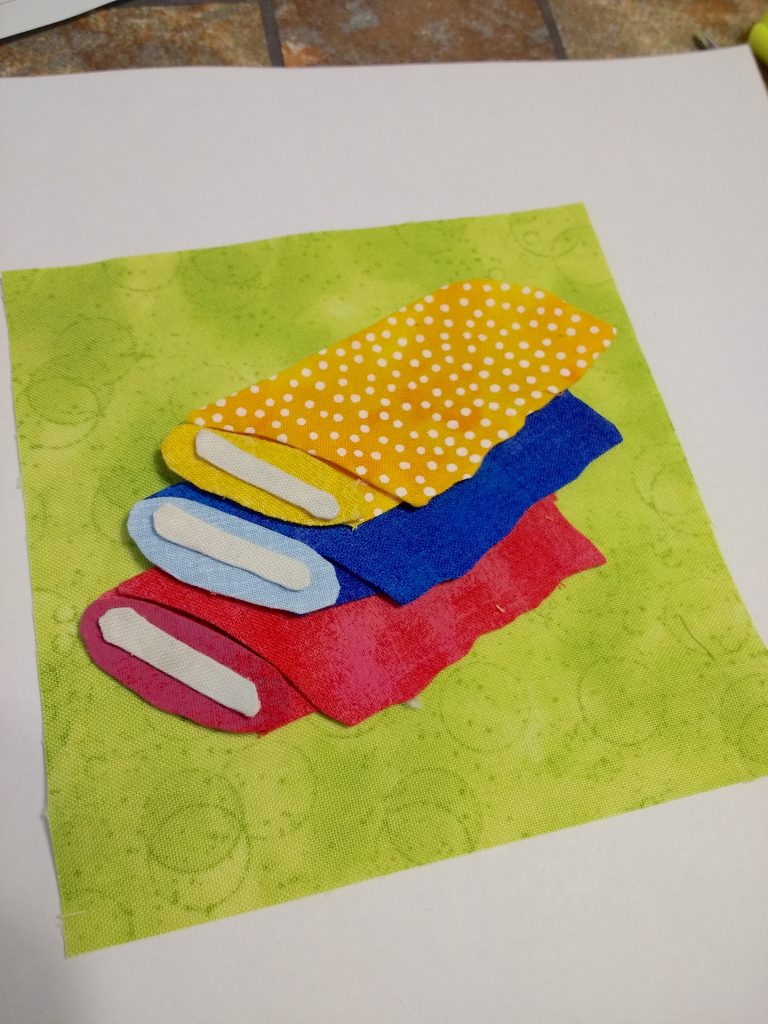
Hacemos lo mismo con cada color de tela, cuando tengamos los tres plegadores, también a puntada escondida, les cosemos uno sobre otro como se ve en la siguiente imagen.
Finalmente aplicamos todo a la tela de fondo…¡y listo!
Espero que os guste, os entretenga y os resulte divertido hacer este Mistery Quilt.
¡Ya se va viendo parte del trabajo! ¿Qué os va pareciendo?
Por último, os detallo las telas que necesitaremos para el próximo bloque del jueves 23 de Abril: utilizaremos las mismas telas que ya hemos puesto en las casitas y en las tijeras.
En nuestro grupo en Facebook podéis compartir los bloques ya realizados, consultar dudas y todo lo que necesitéis. ¡Os esperamos por allí!
¡Nos leemos en la próxima entrega!
ENGLISH VERSION:
Hello everyone,
I’m Mercedes patchwork, knitting and crocheting teacher here at Komola Krafts. I am the one in charge to present you the third release of “Mistery Quilt by Komola Krafts” and I’m very thrilled because of it. As you can see, between my classes and leisure time, I cannot live without the needle and the fabrics in my daily life so participating in the Mistery Quilt was inevitable. I love sharing this lifestyle with all of you!
Third Release of Mistery Quilt by Komola Krafts: Stay at Home
In this block we’re going to be working with Apliquick technique for which we will need adhesive interlining on one side, a fabric glue and the sticks which we’ll be using to give shape to our pieces. If you don’t have these materials at home, further into the text we will show some alternatives; although if you prefer it, you can also use the techniques that my workmates have showed you on other blocks.
In the following link you will be able to download the patterns that you will need for the block. It’s really simple!
First and foremost, we recommend that you choose the fabrics for each piece, making the combinations that you most desire and taking in account the previous blocks. The fabric background of this block is 10*10 cm or 4″*4″. Remember that the blocks will form you Mistery Quilt and will need to have your personal touch.
We’ll copy the patterns in the interlining taking care that the work on paper HeatnBond or Apliquick always ends up inverted, in a mirror style. On our final project we’ll need this work 4 times, 2 on each direction; I mean 2 in mirror to the other 2.
Next, we’ll cut each final piece of interlining without any margin. Once we have each piece cut, we will paste them with an iron on top of the corresponding fabrics and we cut them, this time we’ll leave a margin of around 3 to 4 mm around the pieces. (See pictures 1 & 2).
Now we’ll being to give shape to the pieces with the help of the glue and the sticks. Again, if we don’t have this material at our disposal, we can use a gluestick or even white glue on a small amount and some skewers for that matter. (See pictures 3 & 4).
Take in account that it’s not necessary to flip all of the margins as some are hidden underneath other pieces as if they’re bent they would take up more space. (See pictures 5 & 6).
When all the pieces are prepared, we will be assembling each folder independently. Once mounted, we’ll sew the pieces by stitches to form the complete fabric roll. (See pictures 7, 8 & 9).
We do the same with each colour of fabric. Once we have the 3 folders, also by hidden stitches, we sew one on top of the other as seen on the image 10.
Finally we apply everything to the background fabric….. and we’re done! (See image 11).
I hope you like it, you’re entertained by it and most importantly, you have fun doing this Mistery Quilt.
Last but not least, I provide you which of the fabrics we’ll need for the next block on Thursday 23rd of April: we’ll be using the same ones we have put on the houses and the scissors.
On our Facebook group you can share the blocks that you already made, ask questions and anything you need.
We expect you there!
See you in the next release!
VERSIONE ITALIANA:
Ciao ragazze,
Sono Mercedes, insegnante di patchwork e di uncinetto in Komola Kraft. Sono stata incaricata a presentarvi la terza puntata del “Mistery Quilt by Komola Kraft” e sono molto emozionata per questo.
Come potrete confermare, in classe, non posso vivere senza gli aghi e il tessuto per cui la mia partecipazione nel “Mistery Quilt by Komola Kraft”era inevitabile. Come mi piace condividere questa forma di vivere con tutte voi!
Terza puntata Mistery Quilt by Komola Kraft: Rimani a casa
Con questo blocco andremo a lavorare con la tecnica di apliquik per cui abbiamo bisogno di una teletta termo-adesiva da un lato, una colla e dei bastoncini con i quali ci aiuteremo a dare forma ai nostri pezzi. Se non avete questi materiali in casa, più avanti vi mostreremo una alternativa, anche se si possono utilizzare le tecniche che vi hanno mostrato le mie compagne negli altri blocchi.
In questo collegamento potete scaricare il cartamodello che vi serve per questo blocco! E’ molto facile!
In primo luogo vi raccomandiamo di scegliere il tessuto per ogni pezzo, realizzando gli abbinamenti che più vi piacciono e tenendo presente i blocchi precedenti. Ricordate che tutti i blocchi formeranno il vostro Mistery Quilt e tenderà a far vedere il vostro “timbro” personale.
Iniziamo copiando i cartamodelli sulla teletta tenendo presente che il lavoro in carta HeatnBond o in Appliquik ci risulta sempre invertito, a specchio. Nel nostro progetto finale ci servirà quattro volte questo lavoro, due per ogni verso; vale a dire, due di questi a specchio rispetto agli altri due.
Per proseguire, vi ricordiamo che ogni pezzo di teletta sarà senza margine. Una volta che abbiamo ritagliato i pezzi di teletta, li incolliamo con il ferro da stiro sulla stoffa corrispondente e la ritagliamo, questa volta, lasciando un margine di 3 o 4 millimetri attorno ai pezzi.
Adesso iniziamo a dare forma ai pezzi con l’aiuto della colla e dei bastoncini. Se non abbiamo questo materiale possiamo utilizzare una colla stick oppure colla bianca in poca quantità e i bastoncini degli spiedini.
Non è necessario girare tutti i margini, di fatto alcuni vanno nascosti sotto gli altri pezzi. Se li girate tutti, sarebbero troppo spessi.
Quando saranno pronti tutti i pezzi, andremo a montare quelli che compongono il primo “rotolo” di tessuto e cuciamo con il punto nascosto per formare il “rotolo”di tessuto completo.
Faremo la stessa cosa con ogni colore del tessuto e quando abbiamo terminato i tre rotoli, sempre a punto nascosto li cuciremo uno sopra all’altro come nella seguente immagine.
Finalmente applicheremo il tutto al tessuto di fondo… ed è finito!
Spero che vi piaccia questa puntata e vi risulti divertente realizzare questo Mistery Quilt.
Già si sta vedendo parte del lavoro! Che cosa vi sembra?
In fine, in dettaglio il tessuto che ci serve per il prossimo blocco di giovedì 23 aprile: utilizzeremo lo stesso tessuto che abbiamo messo nella casetta e le forbici.
Nel gruppo di facebook potete condividere i blocchi realizzati, consultare i dubbi e tutto quello che vi serve. Vi aspettiamo lì!
Ci vediamo alla prossima puntata!